What Is the Best Headlight Upgrade: Clear Answers and Key Facts
The best headlight upgrade is usually a high-quality replacement bulb matched to the vehicle’s original headlamp system, combined with clean, properly aimed lenses. A direct-fit LED can be an excellent choice in a headlamp designed for it, but it is not automatically the best option for every car.
An unexpected problem is that a brighter bulb can make nighttime visibility worse if the beam pattern becomes scattered or points into oncoming traffic. This article explains how bulb type, reflector or projector design, lens condition, color temperature, electrical compatibility, and beam aim affect the result, so you can avoid paying for light that creates glare instead of useful road illumination.
The right decision depends first on what is already limiting your headlights. You will learn when to restore cloudy lenses, when premium halogen bulbs make sense, where LED and HID conversions can fail, how to compare usable visibility rather than marketing brightness, and which installation and aiming checks should happen before driving at night.
The Best Upgrade Depends on the Headlight System
Headlight performance is controlled by more than the bulb. The bulb, reflector or projector, lens, wiring, mounting position, and aim all work together to create the beam pattern that illuminates the road.
A bulb that produces more raw light does not necessarily provide more useful light ahead of the vehicle. The most effective upgrade is the one that improves road illumination without creating excessive foreground brightness, dark areas, or glare for other drivers.
For many older vehicles, the best overall sequence is simple: restore or replace damaged lenses, install a quality bulb of the correct type, inspect the electrical connections, and adjust the aim. Only after those basics are sound should a different lighting technology be considered.
Why Lens Condition May Matter More Than Bulb Type
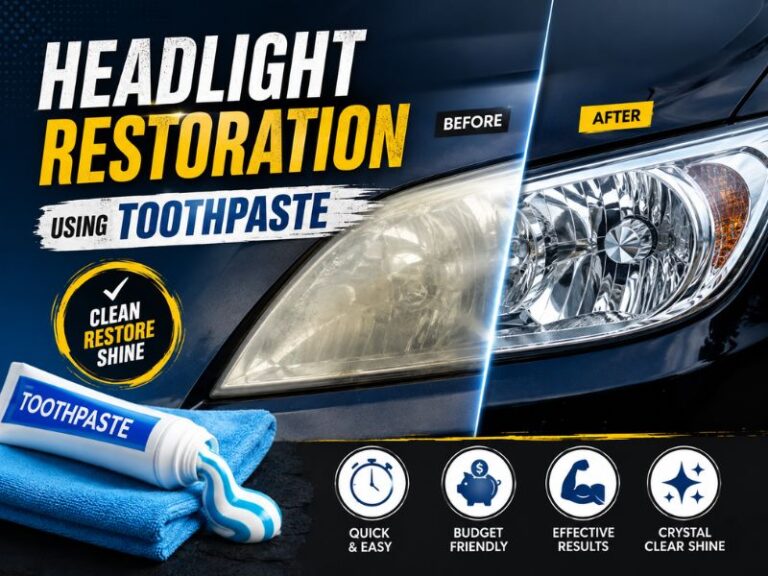
Plastic headlight lenses become yellow, hazy, or cloudy after years of ultraviolet exposure, weather, road debris, and chemical contamination. That damage scatters and absorbs light before it reaches the road, so even a powerful new bulb may produce disappointing results.
A proper lens restoration can bring back much of the original output when the cloudiness is mainly on the outside surface. The work should include sanding or polishing as appropriate and a durable UV-resistant coating; polishing alone may leave the lens clear briefly but allow the haze to return.
Replacement is usually more appropriate when the lens is deeply cracked, damaged on the inside, severely pitted, or deteriorated throughout its material. Moisture inside the housing also requires attention because condensation can reduce visibility and damage electrical components.
Before buying an upgrade, inspect both headlights at dusk. If one side is noticeably dimmer, the issue may be a cloudy lens, burned reflector, loose connector, poor ground, or failing bulb rather than a need for a more powerful light source.
When Premium Halogen Bulbs Are the Best Choice
For a vehicle originally equipped with halogen headlights, a high-quality halogen replacement is often the safest and most predictable improvement. It preserves the filament position and light-source geometry that the original reflector or projector was designed to use.
That compatibility helps maintain the intended cutoff and beam pattern. A premium halogen bulb may provide better forward reach or a cleaner beam than an old standard bulb, although gains are limited by the headlamp housing and the vehicle’s electrical system.
Halogen bulbs have several practical advantages:
- They usually fit the original socket without adapters.
- They preserve the factory optical design.
- They generally avoid radio interference and cooling-fan concerns.
- They are commonly available and straightforward to replace.
- They remain a sensible choice when retrofit legality or compatibility is uncertain.
The main limitation is that performance-oriented halogen bulbs may have shorter service lives than long-life versions. Some also draw the same electrical power while producing more light through filament and gas design, so they still generate substantial heat.
Never install a higher-wattage halogen bulb simply because it appears brighter. Extra electrical load can overheat sockets, wiring, switches, or connectors, particularly in an older vehicle that was not designed for it.
Are LED Headlight Bulbs the Best Upgrade?
LED replacement bulbs can be the best upgrade when the specific vehicle and headlamp housing support a well-designed, compatible product. They offer low power consumption, long potential service life, quick startup, and a whiter appearance that many drivers prefer.
However, an LED bulb is not a universal improvement for a halogen headlamp. A halogen filament is a small, precisely positioned light source; an LED replacement uses one or more electronic emitters arranged differently. If those emitters do not occupy the correct position and orientation, the original reflector may fail to focus the light properly.
The result can be a bright-looking headlight with poor distance illumination. It may create scatter and glare, illuminate road signs more than the pavement, or send stray light above the intended cutoff.
LED retrofits also require attention to physical and electrical details:
- The bulb must fit without touching the housing, dust cap, or nearby components.
- A heat sink or cooling fan needs adequate clearance and airflow.
- The driver module must be secured away from heat and moving parts.
- Some vehicles need an error-canceling interface because of bulb monitoring systems.
- Polarity, flicker, dimming, and high-beam operation should be checked after installation.
Look for a design that closely matches the original filament location, includes clear installation instructions, and has a return policy. Avoid choosing solely by advertised lumens or color. Higher claimed output does not prove that the beam will place light where it is needed.
After installation, inspect the beam against a wall and test the vehicle on a dark road. If the beam has irregular hotspots, excessive upward light, or poor reach despite appearing bright, the LED is not a successful upgrade for that housing.
Why HID Conversion Kits Often Disappoint
High-intensity discharge systems can produce strong light, but a typical HID conversion kit is not a simple substitute for a halogen bulb. HID capsules create light differently and require a ballast, wiring, and appropriate optical equipment.
Installing an HID capsule in a halogen reflector often produces an uncontrolled beam. The headlight may appear dramatically brighter from the driver’s seat while sending disabling glare toward approaching traffic.
A properly engineered HID system uses a compatible projector, ballast, capsule, wiring, and housing. It may be effective when installed as a complete system, but that is a more involved conversion than replacing a bulb.
HID systems also have startup behavior, high-voltage components, ballast placement concerns, and potential clearance issues. For most owners seeking a practical upgrade, a restored housing and compatible halogen bulb—or a carefully verified LED retrofit—is easier to install and evaluate.
Color Temperature Is Not the Same as Brightness
Headlight color is commonly described by color temperature, measured in kelvins. Lower values generally look warmer or more yellow, while higher values appear whiter and may develop a bluish tint.
A whiter appearance can make headlights seem more modern, but it does not automatically improve visibility. Excessively blue light can create more glare and may perform less comfortably in rain, fog, or snow because shorter-wavelength light can increase visible scatter.
For practical nighttime driving, a neutral white or slightly warm white beam is often easier to use than an intensely blue one. The most important qualities remain beam focus, forward reach, contrast, and even coverage.
Be cautious when a product emphasizes color while providing little information about beam control, compatibility, thermal management, or testing. A headlight is a safety component, not merely an appearance accessory.
Check the Electrical System Before Upgrading
Low voltage can make headlights look weak even when the bulbs are new. Corroded grounds, damaged connectors, undersized wiring, aging relays, and voltage drops between the battery and bulb can all reduce output.
Inspect the bulb connectors for browning, melting, looseness, or green corrosion. A damaged connector should be repaired rather than hidden under a new bulb, because resistance at the connection can create heat and cause another failure.
Battery and charging-system problems can also affect headlight performance. If the lights brighten when the engine speed rises, flicker, or change intensity when accessories are switched on, the vehicle may need electrical diagnosis before a lighting upgrade.
Do not bypass factory fuses or add an oversized fuse to solve a lighting problem. The fuse and wire protect the vehicle from excessive current, and an improvised change can increase fire risk.
Headlight Aim Is Part of the Upgrade
Even excellent headlights perform poorly when aimed too high, too low, or unevenly. A small change in suspension height, ride load, accident damage, or housing installation can alter the beam direction.
Check the aim on a level surface using the vehicle manufacturer’s procedure when available. Tire pressures should be correct, the vehicle should carry its normal load, and the headlight housings should be securely mounted.
A wall check can reveal obvious problems, but it is not a substitute for careful adjustment. The low-beam cutoff should be similar from side to side and should not rise excessively into the eyes of approaching drivers.
After changing bulb technology, verify both low and high beams. Some replacement bulbs can twist slightly in the socket, and even a small rotational error may distort the beam pattern.
Safety and Compatibility Checks Before Installation
Start by confirming the bulb size and the headlamp type listed for the vehicle. The same vehicle model may use different housings or bulb sizes across trim levels and model years, so visual similarity is not enough.
Inspect the housing before ordering parts. A reflector with peeling or burned surfaces may not be improved by a new bulb, and an internally damaged projector may require housing replacement or professional repair.
- Turn the lights off and allow halogen bulbs to cool before removal.
- Do not touch a halogen bulb’s glass with bare fingers; oil can create hot spots.
- Keep wiring, drivers, and cooling fans clear of belts, fans, exhaust parts, and water paths.
- Replace bulbs in pairs when matching output and color matters.
- Confirm that dust caps and seals are fully reinstalled.
- Test low beam, high beam, turn signals, and dashboard warnings before driving.
Do not modify a housing by cutting away sealing surfaces or forcing a bulb into place. Water intrusion, vibration, and poor alignment can turn a seemingly successful installation into a short-lived repair.
When Professional Help Is the Better Upgrade
Professional assistance is sensible when the housing is damaged, the beam cannot be aimed, wiring is overheating, or the vehicle has adaptive, self-leveling, or automatic headlight features. These systems may require calibration after a housing or suspension-related repair.
A lighting specialist can measure voltage at the bulb, inspect the optical components, identify beam-pattern problems, and aim the headlights with suitable equipment. This is especially valuable when an upgrade appears bright but produces complaints from other drivers or weak distance visibility.
Professional help is also appropriate for a complete projector or HID conversion. The work involves optical alignment and sealing, not just installing a different bulb, and mistakes can compromise both your vision and the safety of other road users.
How to Choose the Right Upgrade
Use the problem—not the advertising claim—as the starting point. A simple decision process prevents most wasted purchases.
- Inspect the lenses and housings. Restore or replace cloudy, cracked, or moisture-damaged components.
- Identify the original bulb and optical design. Confirm whether the vehicle uses a reflector, projector, halogen, HID, or factory LED system.
- Check electrical health. Look for voltage loss, damaged connectors, weak grounds, and charging problems.
- Choose compatibility over maximum claims. Preserve the intended light-source position and beam control.
- Install carefully and compare both sides. Check fit, orientation, warnings, heat, and operation.
- Aim the headlights. Evaluate the cutoff and road coverage after every meaningful change.
For many halogen-equipped cars, the most balanced answer is a restored lens, quality standard-output or performance halogen bulb, and correct aim. For a compatible housing with a well-designed retrofit, LED may offer a useful improvement, but the beam pattern must prove it.
Conclusion: Choose Useful Light Over Maximum Brightness
The best headlight upgrade is the combination that delivers a controlled, well-aimed beam for your specific vehicle. Start with lens condition, housing integrity, electrical health, and bulb compatibility before considering a technology change.
The major limitation is that LED or HID conversions can create glare and poor illumination when their light source does not match the original optics. Restore the basics first, use a compatible bulb or complete system, then verify the beam on a wall and have the headlights professionally checked if alignment or wiring remains uncertain.