Can You Use Regular Spray Paint on Cars: Complete Guide and Tips
Yes, you can use regular spray paint on a car, but it is rarely the best choice for a durable, factory-like repair. General-purpose spray paint may adhere temporarily, yet it can peel, fade, crack, or react with the car’s existing finish unless the surface, paint type, and clear coat are compatible.
The easily overlooked detail is that “spray paint” describes an application method, not a single coating system. A can made for metal furniture, plastic, or crafts may dry hard while still lacking the automotive adhesion, flexibility, UV resistance, and chemical durability needed on an exposed vehicle panel.
This guide explains when general spray paint is acceptable, why automotive paint performs better, how to prepare and spray a small area, and which mistakes commonly ruin the finish. You will also learn how to judge whether a blemish is suitable for a DIY aerosol repair, when a primer or clear coat is necessary, and when repainting a whole panel should be left to a professional.
What “Regular” Spray Paint Means for a Car
Regular spray paint usually refers to a general-purpose aerosol sold for household projects, décor, tools, furniture, or light metal repairs. It may be labeled enamel, acrylic, lacquer, or a similar formulation, but those labels do not guarantee that it is suitable for automotive refinishing.
Car paint is designed as part of a system. The coating must bond to a specific substrate, tolerate vibration and temperature changes, resist gasoline and road chemicals, and maintain color under prolonged sunlight. A general-purpose product may meet some of these needs but not all of them.
The existing surface matters just as much as the new can of paint. A vehicle may have an original basecoat and clearcoat, a previous repaint, exposed steel, aluminum, plastic trim, or body filler beneath the visible finish. Each surface can require a different primer and preparation method.
When General-Purpose Spray Paint Can Work
Regular spray paint can be reasonable for a limited, low-risk repair where appearance and long-term durability are not critical. Examples include a temporary coating on an old vehicle, a hidden metal bracket, or a small nonstructural part that is not exposed to frequent washing, sunlight, fuel, or abrasion.
It can also work on some removable accessories if the label specifically states that the product bonds to that material. A steel mounting bracket, for example, may accept a general metal enamel after cleaning, scuffing, and priming. That is different from spraying the visible exterior of a hood or door.
For a visible body panel, the result depends on several conditions:
- The old finish is firmly attached and free from rust, wax, grease, and silicone.
- The spray paint is chemically compatible with the existing coating.
- The surface receives the correct primer and adequate curing time.
- The color and gloss match closely enough to make the repair acceptable.
- The repaired area is protected with a compatible automotive clearcoat.
Even when these conditions are met, a general-purpose product may not last as long as automotive paint. It is best treated as a budget compromise rather than a direct substitute.
Why Automotive Spray Paint Is Usually Better
Automotive aerosol paint is formulated for vehicle substrates and conditions. Depending on the product, it may be designed for painted metal, bare steel, aluminum, plastic, or a specific factory color. It generally provides better adhesion, flexibility, color stability, and resistance to weather and road exposure.
Automotive products are also more likely to be offered in factory color codes. A close color match is difficult with generic black, white, silver, or red because vehicle colors often contain metallic or pearlescent particles that change appearance with viewing angle and lighting.
A proper automotive repair commonly uses several compatible layers:
- Primer to promote adhesion and cover minor surface differences.
- Basecoat to provide color.
- Clearcoat to add gloss and protect the color from UV light, water, chemicals, and light abrasion.
Not every small repair needs every layer in the same way, but the products should come from a compatible system. Mixing a lacquer color coat with an incompatible enamel clearcoat, or applying a hot solvent over an uncured layer, can cause wrinkling, lifting, dullness, or loss of adhesion.
Risks of Using the Wrong Spray Paint
The most common problem is poor bonding. The paint may look smooth immediately after spraying but begin to chip around the edges after washing, stone impacts, or normal panel flexing. If the surface was waxed or contaminated with silicone, even a suitable product may fail.
Solvent reaction is another major risk. Some aerosol formulas soften, wrinkle, or dissolve an older finish beneath them. This is especially likely when a strong solvent-based product is sprayed over an incompatible coating or when the lower layer has not fully cured.
Other possible defects include:
- Color mismatch caused by different pigments, gloss levels, or metallic particle orientation.
- Fading from ultraviolet exposure.
- Chalking or loss of gloss after weathering.
- Orange peel, runs, dry spray, or rough texture from incorrect spraying.
- Cracking when rigid paint is applied over flexible plastic.
- Overspray on nearby trim, glass, tires, or adjacent panels.
- Rust returning beneath a repair when corrosion was not removed completely.
Paint that appears acceptable in a garage can look noticeably different outdoors. Natural light reveals variations in gloss, texture, and color that may not be visible under artificial lighting.
Check the Surface Before Painting
Do not spray over loose paint, bubbling rust, peeling clearcoat, or a glossy contaminated surface. Paint cannot correct a weak foundation; it simply covers the defect until the new layer follows the old one away from the panel.
Wash the area with automotive soap, rinse it thoroughly, and dry it. Then remove wax, grease, tar, and silicone using a suitable automotive surface cleaner. Avoid touching the prepared area with bare fingers because skin oils can interfere with adhesion.
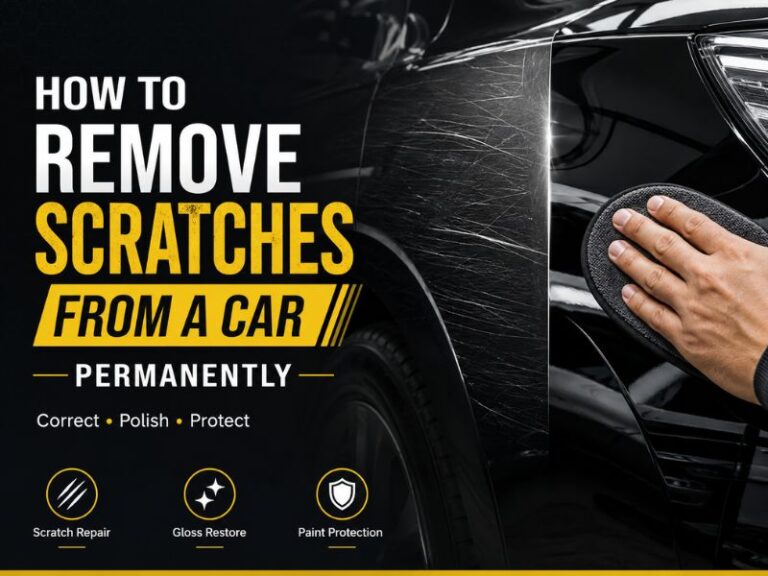
Inspect the damage closely. A shallow scratch that has not reached metal may need only cleaning, light sanding, color, and clearcoat. A deep scratch exposing steel requires rust prevention, while a dent, stretched metal, or peeling finish may need body repair before paint is considered.
If the panel is plastic, identify the material when possible. Bumpers and trim can flex more than steel, so they may need a plastic adhesion promoter and a flexible coating system. A general metal primer is not automatically suitable for plastic.
How to Prepare a Small Repair
Preparation often determines the outcome more than the spraying technique. Work in a clean, dry, well-ventilated area away from wind, dust, direct sunlight, open flames, and ignition sources. Temperature and humidity should fall within the paint manufacturer’s stated range.
- Wash and degrease the repair area.
- Remove loose paint and rust with appropriate abrasive paper or a rust-removal method.
- Feather the edges of the existing paint so there is no sharp ridge around the damaged spot.
- Apply compatible body filler only where necessary, then sand it smooth after curing.
- Scuff the surrounding sound finish to create a paintable surface.
- Mask nearby panels, glass, lights, rubber, wheels, and trim.
- Wipe away dust with a clean, lint-free method and allow the surface to dry.
Use progressively finer abrasive paper as the repair becomes smoother. The exact grit depends on the product and the condition of the panel, but the goal is a uniformly dull surface without deep sanding scratches that will remain visible through the new paint.
Do not sand aggressively through a sound finish unless necessary. Exposing a large area of bare metal increases the chance of corrosion and usually requires a suitable corrosion-resistant primer before color is applied.
Spraying Technique for a Cleaner Finish
Shake the can for the full time stated on its label and continue mixing it periodically during use. Test the spray on masking material or scrap metal first to check the fan pattern, color, and whether the coating reacts with the prepared surface.
Hold the can at the recommended distance, generally with the nozzle perpendicular to the panel. Start moving before pressing the nozzle and release it after moving past the edge. This prevents heavy paint buildup at the beginning and end of each pass.
Apply several light, even coats rather than one wet coat. Light coats reduce runs and solvent trapping, while overlapping each pass consistently helps prevent striping. Allow the required flash time between coats; spraying again too soon can soften the lower layer or create wrinkles.
Keep the can moving at a steady speed. If the paint looks dry and grainy, the can may be too far away or the conditions may be too hot or windy. If it sags or forms curtains, the coat is too heavy or the can is too close.
After the color has flashed and cured according to the label, apply a compatible clearcoat if the system calls for one. Clearcoat should not be used to hide runs, dust, or major texture because those defects will remain visible beneath it.
Color Matching and Blending
Generic spray paint colors rarely match a vehicle as closely as a product mixed for its paint code. The code may be found on a vehicle identification label, often located in a door jamb, under the hood, in the trunk area, or in the glove box, although its location varies by vehicle.
Even paint with the correct code may not match perfectly. Original paint changes with age, sunlight, washing, and previous polishing. A professional repair shop may adjust the color and blend it into adjacent areas to make the transition less noticeable.
For a small chip, applying color only inside the damaged area may be acceptable. For a larger scratch, a hard circle of mismatched paint can look worse than the original damage. A controlled blend requires careful masking, feathering, and clearcoat coverage, making it more demanding than simple spot spraying.
Safety and Curing Precautions
Aerosol paint releases flammable vapors and fine particles. Wear the respiratory protection specified for the product, along with eye protection and gloves, and provide strong ventilation. A simple dust mask is not automatically adequate protection against solvent vapors.
Keep the can away from heat, sparks, pilot lights, cigarettes, and running equipment. Do not paint in an enclosed garage with a gas appliance or other ignition source. Protect surrounding property from overspray, which can travel farther than expected.
Dry to the touch does not mean fully cured. Avoid washing, waxing, polishing, fuel contact, and heavy handling until the product has cured for the stated period. Cool temperatures and high humidity can significantly extend drying and curing time.
When to Choose a Professional Repair
Professional help is sensible when the damaged area is large, the clearcoat is peeling across a panel, rust has perforated the metal, or the panel has a dent that affects its shape. It is also the safer choice when an exact color match matters or the vehicle has a valuable, difficult-to-match finish.
A shop can identify the substrate, remove corrosion, repair body damage, select compatible coatings, and blend the finish into neighboring panels. That process costs more than a single aerosol can, but it reduces the risk of repeated repairs and visible deterioration.
Stop a DIY job if the paint wrinkles, bubbles, remains soft, or begins lifting. Let the area dry, determine which coating caused the reaction, and remove or stabilize the failed layers before trying again. Covering a chemical failure with more paint generally makes the eventual correction harder.
Can You Use Regular Spray Paint on Cars? Practical Verdict
Regular spray paint can be used on a car for a temporary repair, a hidden component, or a low-expectation project, but it is not the most reliable choice for visible exterior bodywork. For a lasting repair, use a compatible automotive primer, color coat, and clearcoat, and follow the preparation and curing instructions on the labels.
The main limitation is compatibility: a product that dries on household metal may still fail on a vehicle’s existing clearcoat, plastic, or flexible panel. Start by cleaning and identifying the damaged surface, test the coating in an inconspicuous area, and choose professional refinishing when the repair is large, structural, rust-related, or expected to look factory-new.