How to Adjust, Align, and Aim Headlights and Fog Lights Perfectly
To aim headlights and fog lights correctly, park the vehicle on a level surface facing a flat wall, establish reference marks from the lamp centers, compare the beam cutoff with the manufacturer’s aiming specification, and make small adjustments without raising the beams high enough to create glare.
Correct headlight aim is about more than making both beams look even. The goal is to place the light where the optical system was designed to put it. A beam aimed too high can glare other drivers, while one aimed too low can shorten useful visibility. Fog lights also need their own lower, broader aim rather than being treated like additional headlights.
Because lighting systems vary between vehicles, the exact wall distance, cutoff position, and available adjustment screws should always be confirmed for the specific model.
Why Proper Headlight Aim Matters
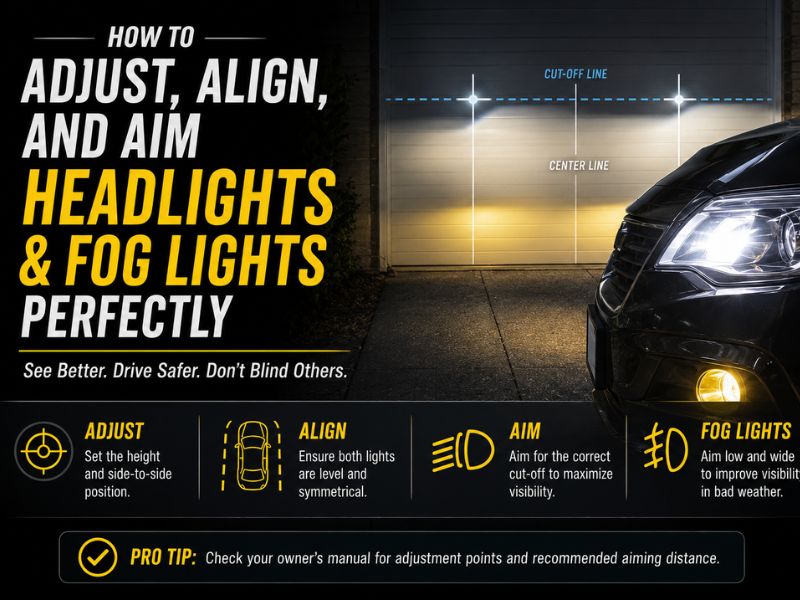
Headlights need to illuminate the road far enough ahead without sending excessive light into the eyes of other drivers.
Correct aim can help with:
- Lane visibility
- Road-edge visibility
- Signs and markings
- Curves and intersections
- Nighttime comfort
- Glare control
When headlights are too high, too much light may be projected above the useful road area.
When they are too low, the road immediately in front of the vehicle may look bright while useful distance visibility becomes poor.
Fog lights have a different job. They are intended to create a low, broad pattern near the road rather than throw light far into the distance.
How Do You Know Your Headlights Need Adjustment?
Several symptoms can suggest the aim should be checked.
These include:
- One beam is noticeably higher than the other
- Headlights seem to point unusually high
- The road directly in front is bright but distance visibility is poor
- Other drivers frequently flash their high beams
- Headlight housings were replaced
- The vehicle was involved in a front-end collision
- Suspension height changed
- Springs or shocks were replaced
- Heavy permanent cargo changed vehicle attitude
However, do not assume two beam patterns must look perfectly identical.
Many modern low beams are intentionally asymmetric. One side of the pattern may include a step or rise designed into the optics.
What You Need to Aim Headlights
A basic wall-aiming check requires only a few items:
- Flat, level parking area
- Vertical wall or garage door
- Measuring tape
- Painter’s tape
- Tire-pressure gauge
- Correct screwdriver, socket, or hex tool
- Owner’s or service manual
If the vehicle uses adaptive, automatic-leveling, or electronically calibrated headlights, additional equipment may be required.
Prepare the Vehicle Before Adjusting the Lights
The setup determines whether the adjustment is meaningful.
Check Tire Pressure
Uneven tire pressure can change how the vehicle sits.
Correct the tires to the vehicle’s recommended pressure before aiming the lights.
Use the Correct Vehicle Load
Follow the manufacturer procedure for fuel level, passengers, and cargo.
Avoid aiming the headlights with an unusually heavy load in the trunk unless that represents the vehicle’s specified setup.
Let the Suspension Settle
Park normally and allow the vehicle to sit naturally on its suspension.
If necessary, gently settle the suspension before taking measurements.
Clean the Lenses
Mud, road film, and heavy haze can distort the visible beam pattern.
Clean the lenses before trying to identify the cutoff.
Use Level Ground
A sloped driveway can make a correctly aimed headlight look wrong.
The vehicle and wall should be on a reasonably level surface.
How Far Should the Car Be From the Wall?
There is no single distance that applies to every vehicle.
Some common aiming procedures use approximately 25 feet between the headlamp and wall, but other manufacturers specify different distances.
That matters because the amount of vertical drop seen on the wall changes with distance.
If your vehicle provides a specific wall distance, use that number rather than a generic internet rule.
Manufacturer instructions should take priority over a universal measurement.
How to Mark the Wall for Headlight Alignment
Once the vehicle is positioned correctly, create reference marks.
Step 1: Find the Headlight Reference Center
Look for a center mark, optical-axis mark, or other reference point on the lamp.
Do not assume the geometric center of the entire housing is always the optical center.
Step 2: Measure the Height
Measure from the ground to the reference point.
Transfer that height to the wall with tape.
Step 3: Mark Left and Right Centers
Measure the horizontal location of each lamp center and mark corresponding vertical reference lines on the wall.
Step 4: Add the Correct Cutoff Reference
Some vehicles specify that the low-beam cutoff should fall a certain amount below the lamp-center height at the prescribed distance.
Do not automatically aim the cutoff exactly at lamp-center height.
Use the vehicle-specific target when available.
Understanding the Low-Beam Pattern
Modern headlights can produce complex patterns.
A low beam may include:
- A horizontal cutoff
- A step
- A rising section
- A brighter hotspot below the cutoff
- Different left and right pattern features
Do not aim by the brightest spot alone.
The cutoff or other manufacturer-defined reference feature is usually more useful.
This is particularly important with projector headlights, where the cutoff may be very sharp.
Trying to make the entire beam look perfectly rectangular can result in incorrect aim.
How to Adjust Headlights Vertically
Vertical aim is the adjustment most commonly used.
Turn On the Low Beams
Use low beam unless the manufacturer specifies another setting.
Locate the Vertical Adjuster
The adjuster may be:
- On top of the headlamp
- Behind the housing
- Accessible through an opening
- Operated by a screw, socket, or hex drive
Make Small Changes
Turn the adjuster gradually.
Large turns can move the beam more than expected.
Watch the Cutoff
Compare the beam to the marked reference.
Continue until the cutoff or specified reference reaches the correct position.
Repeat on the Other Side
Aim each lamp to its own reference rather than adjusting one solely to match the other visually.
Should You Adjust Headlights Horizontally?
Not always.
Many modern headlight systems do not provide normal user horizontal adjustment, and some are designed so the horizontal aim is fixed by the housing and mounting points.
Do not:
- Modify mounting tabs
- Bend brackets
- Force the housing sideways
- Search for an adjustment screw that may not exist
If a headlight appears to point sharply left or right after a collision, housing replacement, or front-end repair, the problem may involve:
- Broken mounting points
- Incorrect lamp installation
- Structural misalignment
- Wrong replacement housing
In that case, professional inspection may be more appropriate than trying to compensate with improvised adjustment.
How to Align Left and Right Headlights
The two low beams should work together, but they should still be aimed according to their intended references.
Check:
- Cutoff height
- Overall pattern
- Severe left/right misalignment
- Unusual scatter
Avoid forcing both beams to look exactly identical if the optical design is intentionally asymmetric.
Aim each lamp correctly first, then evaluate the combined pattern.
How to Aim LED Headlights
LED headlights follow the same basic principle: aim the optical system, not the individual LED itself.
Modern LED housings may contain:
- Multiple projectors
- Several reflectors
- Complex internal optics
- Electronic leveling mechanisms
The adjustment often moves the complete lamp assembly or optical module.
Do not attempt to reposition internal LED elements unless the manufacturer specifically provides a service procedure.
A sharp cutoff can make LED headlight aim easier to see, but it also makes incorrect vertical aim more obvious.
How to Aim Projector Headlights
Projector headlights often show a distinct cutoff line.
That makes wall aiming relatively straightforward.
Use the specified cutoff feature rather than the brightest hotspot.
Depending on the projector design, the pattern may include:
- Flat horizontal sections
- Steps
- Rising segments
Do not eliminate these intentional features by trying to make the entire beam level.
How to Aim High Beams
High beams may not have a separate user adjustment.
On many vehicles, low and high beams share the same housing alignment.
That means adjusting the low-beam housing also changes high-beam aim.
If your vehicle provides a separate high-beam aiming procedure, follow it.
Otherwise, do not independently alter high-beam position simply because the brightest spot looks slightly off-center.
Low-beam aim is often the primary reference for the assembly.
How to Aim Fog Lights
Fog lights are not supposed to mimic low beams or high beams.
Their useful pattern is generally:
- Low
- Broad
- Close to the road
- Controlled vertically
Start with the same basic preparation:
- Level vehicle
- Correct tire pressure
- Normal load
- Flat wall
- Clean lenses
Then identify the fog-light cutoff or reference pattern and adjust according to the vehicle specification.
Make small vertical changes.
Avoid raising the fog lights just to make them shine farther.
That can reduce their intended usefulness and increase glare.
How High Should Fog Lights Be Aimed?
There is no universal drop measurement that fits every fog lamp.
The correct aim depends on:
- Lamp mounting height
- Beam design
- Distance from the wall
- Vehicle specification
- Local lighting requirements
What matters is that the pattern remains low and controlled.
A fog light that sends substantial light high into the distance is probably not serving its intended role effectively.
Fog Lights vs. Headlights: Should the Aim Match?
No.
| Light Type | Main Aim Characteristic |
| Low beam | Controlled forward light with defined cutoff |
| High beam | Longer-range forward illumination |
| Fog light | Low, broad near-road illumination |
| Auxiliary driving light | Depends on lamp design and legal use |
Using the same wall target for all four lamp types can produce incorrect results.
Each system should be aimed according to its own beam design.
Headlight Aim After Replacing a Bulb
If the beam pattern changed immediately after installing a new bulb, check installation before adjusting the housing.
Make sure:
- Correct bulb type is installed
- Bulb is fully seated
- Retainer is properly engaged
- Connector is secure
- Bulb is not rotated incorrectly
- Housing is undamaged
A bulb that sits slightly crooked can create severe beam distortion.
Adjusting the housing to compensate can make the overall aim worse.
Headlight Aim After Installing LED Replacement Bulbs
Retrofitting LED bulbs into a housing designed for another light source can change the optical pattern.
Possible results include:
- Poor cutoff
- Scattered light
- Excessive glare
- Weak hotspot
- Incorrect beam distribution
Lowering the headlights does not necessarily solve these problems.
If the light source is physically incompatible with the reflector or projector optics, the beam may remain poor regardless of aim.
Aiming cannot correct every optical compatibility problem.
Headlight Aim After Lift or Suspension Changes
Vehicle ride height affects headlight angle.
A lift kit, lowering springs, suspension repair, or permanent heavy rear load can change vehicle pitch.
If the front rises relative to the rear, the headlights may point higher.
If the nose sits lower, the beams may point lower.
After major ride-height changes, recheck the aim using the proper procedure rather than guessing how much adjustment is needed.
How to Aim Headlights After Replacing the Housing
Before adjustment, verify that the replacement lamp is installed correctly.
Inspect:
- Mounting tabs
- Bolts
- Brackets
- Bumper alignment
- Radiator support area
- Housing fit
Then perform the normal aiming procedure.
If the lamp cannot be adjusted into the correct position, there may be:
- A broken mount
- Incorrect replacement part
- Collision damage
- Structural misalignment
Do not keep turning the adjustment screw beyond its normal range.
Why One Headlight Still Looks Different
Different-looking beams do not always mean poor aim.
Possible reasons include:
- Intentional asymmetric design
- Different bulb output
- Incorrect bulb seating
- Lens haze
- Damaged reflector
- Damaged projector
- Incorrect replacement housing
If one side has a completely different beam shape, inspect the lamp itself before repeatedly adjusting its position.
How to Check Headlight Aim on the Road
After completing the wall adjustment, a nighttime road check can help confirm that the result feels normal.
Look for:
- Useful forward visibility
- No obvious upward beam
- No severe left/right mismatch
- Fog lights staying low
- No excessive scatter
Do not perform adjustments in an unsafe roadside location.
The road check should confirm the wall adjustment, not replace it.
What About Adaptive or Auto-Leveling Headlights?
Some modern vehicles use systems that automatically change beam position.
These may include:
- Automatic leveling
- Steering-responsive headlights
- Adaptive driving beams
- Height sensors
- Electronic calibration
A simple mechanical wall adjustment may not be enough.
Some systems require:
- Diagnostic equipment
- Calibration
- Sensor initialization
- Manufacturer service procedures
If the vehicle displays a lighting-system warning or the beams move abnormally, professional diagnosis may be necessary.
When Should You Have Headlights Professionally Aimed?
Consider professional service if:
- The vehicle had front-end collision damage
- Headlight mounting points are broken
- Adaptive lighting is involved
- Automatic leveling has a fault
- Beam cannot reach the specified target
- Adjustment screws are damaged
- Replacement housing has an abnormal pattern
- One lamp points sharply sideways
- You cannot identify the correct aiming procedure
A proper optical aiming machine may also provide more precise results than a basic wall setup.
Common Headlight-Aiming Mistakes
Avoid these common errors:
- Aiming only by eye on the road
- Assuming one wall distance applies to every vehicle
- Using sloped pavement
- Ignoring tire pressure
- Aiming by the brightest hotspot
- Raising beams simply for more distance
- Adjusting horizontal aim without confirming it is available
- Making both beam patterns artificially identical
- Trying to fix an incompatible LED bulb by aiming lower
- Pointing fog lights like driving lights
- Making large adjustment turns
- Ignoring broken headlight mounts
Frequently Asked Questions
How Do I Aim My Headlights Perfectly?
Use a level surface, correct vehicle setup, a flat wall, manufacturer reference measurements, and the low-beam cutoff or specified aiming feature.
How Far From a Wall Should I Park?
Use the distance specified for your vehicle. Around 25 feet is common in some procedures, but it is not universal.
How High Should Headlights Be Aimed?
There is no single correct height. The cutoff position depends on lamp height, wall distance, and manufacturer specification.
Should Both Headlights Be the Same Height?
Their main cutoff references may be similar, but the complete left and right patterns may not look identical because of intentional optical design.
Can I Adjust Headlights Left and Right?
Some systems allow it, while others do not provide normal horizontal adjustment. Check the exact vehicle procedure before changing horizontal aim.
How Do I Know if My Headlights Are Aimed Too High?
Possible signs include excessive light above the road, frequent flashes from other drivers, or a cutoff positioned above the specified wall reference.
How Do I Aim LED Headlights?
Aim the complete optical pattern using the manufacturer reference, just as you would with other headlamp types. Do not reposition internal LED elements.
Do Headlights Need Adjustment After Replacing Bulbs?
Not always. First verify that the bulb is installed correctly. A poorly seated bulb can create a bad pattern without any change in housing aim.
Do Headlights Need Re-Aiming After a Lift Kit?
They should be checked because changing ride height can change vehicle pitch and headlight angle.
How Do You Aim Fog Lights?
Use a level surface and wall, identify the fog-light cutoff or reference, and adjust vertically to the vehicle specification.
Should Fog Lights Point Down?
They should generally create a low, broad pattern rather than point high into the distance. Exact aim depends on the lamp design and vehicle specification.
Can Improper Headlight Aim Cause Glare?
Yes. Headlights aimed too high can send unnecessary light toward other drivers instead of concentrating it where the roadway needs illumination.
Conclusion
To adjust, align, and aim headlights and fog lights correctly, start with the vehicle level and properly prepared, use a flat wall as a reference, identify the correct beam cutoff, and make only the adjustments specified for your particular lighting system.
The most important mistake to avoid is using one generic measurement for every vehicle. Headlight systems differ, and the correct wall distance, cutoff drop, available adjusters, and beam shapes can vary.
Vertical adjustment is usually the main DIY correction. Horizontal adjustment may not be provided or intended on some systems, so do not modify mounts just to move the beam sideways.
Fog lights also require their own low, broad alignment. Raising them for more distance defeats their intended purpose and may increase glare.
If a beam remains distorted after correct adjustment, check the bulb installation, housing condition, lens, projector, and replacement-part compatibility. Aiming cannot repair poor optics.
Modern adaptive or auto-leveling headlights may require electronic calibration rather than a screwdriver.
Perfect headlight aim is not about pointing the lights as far down the road as possible. It is about placing the designed beam pattern exactly where the vehicle manufacturer intended it, giving you useful nighttime visibility without creating unnecessary glare for everyone else.