How to Test Purge Valve With Multimeter: Complete DIY Guide
The short answer to how to test purge valve with multimeter is to disconnect the purge valve electrical connector, set the meter to resistance (ohms), and measure across the valve’s two electrical terminals.
An open circuit, a near-short circuit, or a reading outside the specification for your exact vehicle can indicate a failed solenoid coil.
However, a multimeter test checks mainly the electrical condition of the purge solenoid. A purge valve can have normal electrical resistance and still be mechanically stuck open, stuck closed, or leaking internally.
For a more complete diagnosis, combine the resistance test with an airflow or sealing test and, when appropriate, a solenoid activation test.
You can also perform several useful checks without a vacuum pump. This guide explains each method, what the results mean, and how to avoid replacing a good purge valve because of an unrelated EVAP problem.
How to Test Purge Valve With Multimeter
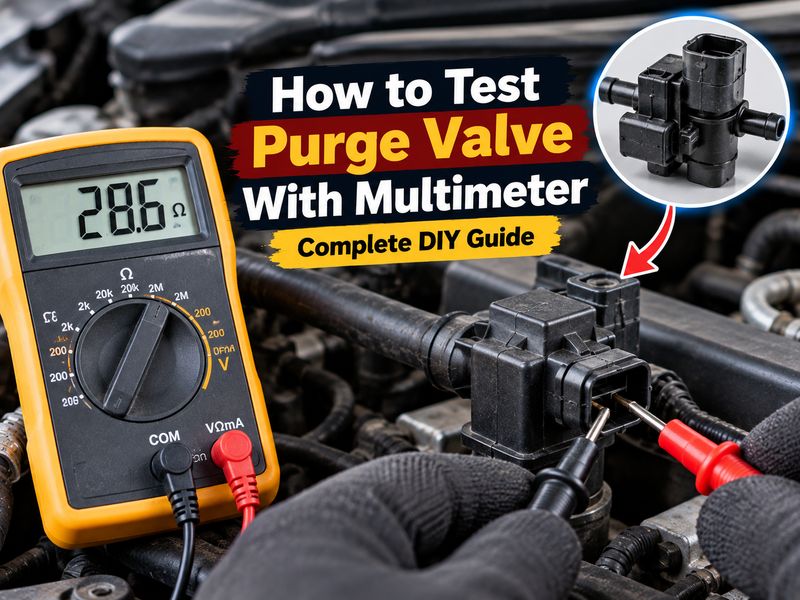
To test an EVAP purge valve with a multimeter, first locate the valve and unplug its electrical connector. With the ignition off, measure resistance directly across the electrical terminals on the purge valve itself.
The basic procedure is:
- Turn the engine and ignition off.
- Disconnect the purge valve electrical connector.
- Set the multimeter to the ohms or resistance setting.
- Touch one meter probe to each terminal on the purge valve.
- Compare the reading with the specification for your exact vehicle.
Do not use a universal resistance number for every purge valve.
Different vehicles use different solenoid designs, and the correct resistance can vary substantially. The factory service manual or reliable vehicle-specific repair information should be used for the exact specification.
If the meter displays OL, open, or infinite resistance, the solenoid winding may be broken internally.
If resistance is extremely close to zero when the specification calls for significantly more resistance, the coil may be internally shorted.
A reading that falls within specification tells you that the electrical coil is probably intact. It does not prove that the valve opens, closes, or seals correctly.
What Is a Purge Valve Solenoid?
The purge valve is part of the vehicle’s EVAP, or evaporative emissions control, system.
Fuel naturally produces vapor inside the gas tank. The EVAP system captures that vapor and stores it inside the charcoal canister rather than releasing it into the atmosphere.
When engine conditions are appropriate, the engine computer operates the purge solenoid. The valve opens and allows intake vacuum to pull stored fuel vapor from the charcoal canister into the engine.
The vapor is then burned during combustion.
The component may be called a:
Purge valve, EVAP purge valve, canister purge valve, purge solenoid, or canister purge solenoid.
For many vehicles, these terms describe the same basic electrically controlled valve.
How Does a Purge Solenoid Valve Work?
Most purge valves contain an electromagnetic coil and an internal valve mechanism.
When the engine computer sends the appropriate electrical command, the electromagnetic field moves the internal mechanism and changes the valve position.
Many purge valves are normally closed, meaning they should block vapor flow when they are not energized.
The engine computer does not necessarily switch them simply fully on and fully off. Many modern systems use pulse-width modulation, or PWM, rapidly controlling the solenoid to regulate the amount of purge flow.
This matters during testing because applying battery voltage directly to an unknown valve is not always the correct diagnostic procedure.
Always verify the electrical design before powering a purge solenoid manually.
What Tools Do You Need?
A basic purge-valve diagnosis can be performed with relatively few tools.
A digital multimeter is the most important tool for electrical testing. Vehicle-specific service information is also useful because it tells you the correct resistance and circuit specifications.
For additional testing, a scan tool, jumper wires, test light, hand vacuum pump, or low-pressure air source may help.
You do not need every one of these tools to perform useful checks.
If you do not have a vacuum pump, the resistance test and basic sealing test can still reveal many common purge-valve failures.
Step 1: Locate the Canister Purge Valve
The first challenge is finding the correct component.
On many vehicles, the purge valve is located in the engine compartment near the intake manifold or throttle body.
It usually has an electrical connector and one or more vapor hoses.
However, its exact location varies considerably by make, model, engine, and year.
Do not confuse the purge valve with the EVAP vent valve, which is commonly located closer to the charcoal canister or fuel tank.
The purge valve controls vapor flow toward the engine. The vent valve performs a different function on the canister side of the EVAP system.
Step 2: Inspect the Purge Valve Before Testing
A visual inspection can reveal problems before you even connect the multimeter.
Look closely at the electrical connector and vapor lines.
Check for cracked hoses, broken fittings, damaged wires, corrosion in the connector, disconnected lines, and obvious physical damage to the valve.
A perfectly functioning purge valve cannot correct a cracked vapor hose beside it.
Likewise, a damaged electrical connector can prevent a good valve from operating.
If you find obvious wiring or hose damage, address that problem before automatically replacing the solenoid.
Step 3: Disconnect the Electrical Connector
Turn the ignition completely off before disconnecting the valve.
Release the locking tab carefully rather than pulling on the wires.
Engine-compartment electrical connectors become brittle with age and heat, so excessive force can break the locking mechanism.
Once disconnected, you will normally see two terminals on the purge valve itself.
Those are the terminals used for the basic resistance test.
Step 4: Set the Multimeter to Resistance
Select the Ω, or ohms, setting on your digital multimeter.
If the meter is auto-ranging, you usually do not need to choose a specific resistance range.
If it is manually ranged, select a low resistance range suitable for testing an automotive solenoid.
Do not perform the resistance test with the circuit powered.
Resistance should be measured across the disconnected component with the ignition off.
Step 5: Measure Purge Valve Resistance
Touch one probe to each electrical terminal on the valve.
Polarity normally does not matter for a simple coil-resistance measurement.
Wait until the reading stabilizes.
Then compare the value with the specification for your exact purge valve.
The important point is not whether the reading matches a generic internet number. It needs to match what the manufacturer specifies for your vehicle.
What Does an OL Reading Mean?
If your multimeter shows OL, infinity, or no continuity, the coil may have an internal open circuit.
That means the electrical winding has been interrupted and current cannot pass through the solenoid normally.
If the factory specification calls for measurable resistance and you get an open circuit, the valve is typically electrically faulty.
What Does Very Low Resistance Mean?
An abnormally low resistance measurement can suggest that the solenoid winding is internally shorted.
Again, compare the measurement with the vehicle specification.
A low number should not be considered bad simply because it looks low. Some solenoids naturally have relatively low resistance.
What If Resistance Is Correct?
A correct resistance reading means the solenoid coil probably has electrical continuity and is not obviously open or shorted.
It does not prove the purge valve is good.
The valve could still be:
Mechanically stuck open
Mechanically stuck closed
Restricted by contamination
Leaking past its internal seal
Moving only partially
That is why resistance testing should be followed by a mechanical test when symptoms still point toward the purge valve.
How to Test a Purge Valve Solenoid for Power
If the purge valve itself passes the resistance test but does not operate, the problem may be in the vehicle wiring rather than the valve.
Many automotive purge circuits provide battery voltage to one side of the solenoid while the engine control module controls the other side, often by switching or pulsing the ground circuit.
The exact arrangement varies.
With the correct wiring diagram, you can check whether the electrical connector receives the expected power supply with the ignition in the appropriate position.
Do not assume that both connector terminals should show battery voltage.
One terminal may be computer-controlled, and probing the wrong circuit incorrectly can produce misleading results or potentially damage electronic components.
If you are not comfortable reading automotive wiring diagrams, limiting DIY testing to the disconnected valve itself is safer.
How to Test a Purge Solenoid Valve With a Click Test
A functional purge solenoid often makes an audible or tactile click when activated.
This can provide a quick mechanical clue.
If the vehicle supports bidirectional scan-tool testing, commanding the purge valve on and off with the scan tool is usually the best way to perform this check.
You may hear or feel the valve clicking as the command changes.
A click tells you that the internal mechanism is moving.
However, this is important: a purge valve can click and still be bad.
The valve may move but fail to seal completely when closed. It may also open only partially or have debris preventing normal flow.
A click test should therefore be considered a functional check, not final proof that the valve is healthy.
Can You Apply 12 Volts Directly to a Purge Valve?
Sometimes, but not as a universal test.
Many conventional automotive purge solenoids operate from a 12-volt electrical system, and vehicle-specific service procedures may allow direct activation during testing.
However, modern purge valves can be controlled differently, and some circuits use pulse-width modulation.
Do not simply connect battery power to an unknown purge valve because you saw the technique used on a different vehicle.
First verify:
The valve’s electrical design
Correct terminal polarity if relevant
Whether direct battery voltage is allowed
Maximum activation time
The safest option is to use a bidirectional scan tool or follow the service procedure for the exact vehicle.
How to Test Canister Purge Valve for a Mechanical Leak
One of the most important purge-valve failures is an internal leak.
A valve may have perfect electrical resistance but still allow air through when it is supposed to be closed.
For a normally closed valve, remove it or disconnect the relevant hoses according to the service procedure.
With the valve unpowered, check whether air can pass through it.
A properly sealing normally closed purge valve should generally block airflow when it is not being commanded open.
If air passes freely through a valve that should be closed, the valve may be stuck open or leaking internally.
This can explain symptoms such as rough idle and hard starting after refueling.
How to Test Purge Valve Without Vacuum Pump
You can perform several useful checks even if you do not own a vacuum pump.
The easiest combination is:
Resistance test + click test + low-pressure airflow test.
First test the solenoid resistance with a multimeter.
Then determine whether the valve responds when commanded using an appropriate scan tool or vehicle-specific activation procedure.
Finally, check whether a normally closed valve passes air while unpowered.
Low-Pressure Airflow Test
Remove the valve if necessary so you can access its vapor ports safely.
With the valve unpowered, use a clean hand-operated squeeze bulb, syringe-style air source, or another very gentle low-pressure source to check whether air passes through it.
Do not use high-pressure shop air. Purge valves are designed for controlled vapor flow, not for being blasted with high-pressure compressed air.
Also avoid putting your mouth directly on a used EVAP component or hose. Fuel-vapor residue may be present.
If a normally closed valve passes air easily with no electrical command, it is likely not sealing correctly.
Can You Test the Purge Valve Without Removing It?
Sometimes.
A scan tool can often provide useful information while the valve remains installed.
A technician may command the purge valve while monitoring engine idle, fuel trims, fuel tank pressure data, or other EVAP information.
On certain systems, temporarily isolating the purge line during diagnosis can also help determine whether unwanted purge flow is affecting the engine.
However, removing the valve usually makes resistance and leak testing easier.
Whether removal is necessary depends on the vehicle and the specific test being performed.
How to Test Whether the Purge Valve Is Stuck Open
A stuck-open purge valve is one of the most common failure modes to look for.
It often produces symptoms such as difficult starting after refueling, rough idle, or fuel-trim problems.
A useful basic test is to check whether a normally closed valve allows airflow while it is disconnected and unpowered.
If air flows freely through the valve when it should be closed, the internal valve is likely leaking.
Scan data can provide another clue.
If isolating the purge path causes a rough idle or abnormal fuel trims to improve substantially, unwanted purge flow may have been entering the intake.
How to Test Whether the Purge Valve Is Stuck Closed
A valve stuck closed will not allow the expected vapor flow when the engine computer commands it open.
This failure may cause a check engine light without creating obvious rough running.
A scan tool can be useful because the technician can command purge operation and monitor how the EVAP system responds.
If the solenoid clicks but no airflow occurs, the internal valve may be blocked or mechanically stuck.
If the valve does not click and its resistance measurement is incorrect, an electrical coil failure is more likely.
If the valve itself tests correctly but does not operate when connected to the car, investigate the wiring and computer control circuit.
Multimeter Test vs Mechanical Test
These tests answer different questions.
| Test | What It Checks | What It Cannot Fully Confirm |
| Resistance test | Condition of solenoid coil | Whether valve seals |
| Power/circuit test | Electrical supply and control | Mechanical condition |
| Click test | Internal movement | Proper sealing and flow |
| Airflow test | Whether valve opens or leaks | Electrical circuit condition |
| Vacuum test | Ability to seal under vacuum | Vehicle wiring |
| Scan-tool test | Computer command and system response | May require further mechanical confirmation |
A complete diagnosis often requires more than one test.
Why a Purge Valve Can Pass the Multimeter Test and Still Be Bad
This is one of the most important things to understand when learning how to test a purge valve.
The electrical coil and mechanical valve are separate parts of the same assembly.
The coil can have exactly the correct resistance while the internal valve is contaminated or worn.
For example, a small piece of debris can prevent the valve from completely closing.
The multimeter will still show a normal coil.
But when the engine is off or idling, air and fuel vapor may leak through the valve continuously.
That is why a normal ohm reading should never be the only reason you declare the purge valve good.
Common Purge Valve Test Mistakes
One common mistake is using a generic resistance number from another vehicle.
Another is assuming that hearing a click proves the valve is good.
A third mistake is replacing the purge valve simply because an EVAP code is present.
The EVAP system contains other components that can cause similar faults, including the vent valve, charcoal canister, fuel tank pressure sensor, vapor hoses, wiring, and gas cap.
Avoid using high-pressure compressed air through the purge valve as well. A gentle sealing test is enough.
Finally, never perform resistance testing on a powered circuit. Disconnect the component before measuring ohms.
What Symptoms Suggest You Should Test the Purge Valve?
Testing the purge valve makes sense when symptoms or trouble codes point toward incorrect purge operation.
One especially useful clue is hard starting immediately after filling the fuel tank.
A purge valve stuck open can allow excessive fuel vapor into the intake after refueling and make the mixture too rich during startup.
Other possible symptoms include rough idle, occasional stalling, hesitation, a check engine light, EVAP trouble codes, and abnormal fuel trims.
A valve stuck closed may produce almost no noticeable drivability symptoms.
What Trouble Codes Can Be Related to the Purge Valve?
Several EVAP diagnostic trouble codes can be associated with purge-flow or purge-circuit problems.
However, the exact interpretation varies between vehicles.
A code describing incorrect purge flow may be caused by the valve, but it could also result from blocked hoses, leaks, wiring problems, or another EVAP component.
Electrical circuit codes make checking the solenoid resistance and wiring particularly useful.
Never treat a code description as an instruction to replace a part automatically.
The code tells you which system or condition the engine computer detected. Testing identifies the actual cause.
Bad Purge Valve vs Bad Wiring
If the purge valve resistance is within specification and the valve operates correctly when properly tested outside the vehicle, the problem may be electrical wiring.
Inspect the connector for corrosion, spread terminals, broken locking tabs, and damaged wires near the connector.
If vehicle-specific service information is available, check the power and control circuits according to the wiring diagram.
Do not use a test light or jumper wire indiscriminately on an engine computer circuit.
Modern control modules can be damaged by improper electrical testing.
Bad Purge Valve vs Bad Vent Valve
The purge valve and EVAP vent valve are commonly confused.
The purge valve is usually on the engine side of the system and controls vapor movement toward the intake.
The vent valve is generally associated with the charcoal canister and controls air entering or leaving the EVAP system.
Both can trigger EVAP trouble codes.
If the purge valve passes electrical and mechanical tests, the vent valve and the rest of the EVAP system may need to be checked.
What If the Purge Valve Tests Good?
If the purge valve passes all appropriate tests, do not replace it simply because the vehicle has an EVAP code.
Instead, continue diagnosing the system.
Possible problems include a cracked vapor line, failed vent valve, damaged charcoal canister, fuel tank pressure sensor fault, loose or damaged gas cap, or electrical wiring issue.
An EVAP smoke test is particularly useful for locating small vapor leaks that are difficult to see.
A good purge valve combined with a persistent EVAP code means the diagnosis needs to move beyond the purge valve.
Should You Replace a Purge Valve That Fails the Test?
If the valve clearly fails the manufacturer-specified resistance test, cannot seal when it should be closed, or cannot operate correctly when properly commanded, replacement is usually the normal repair.
Purge valves are generally replaced as complete assemblies rather than internally repaired.
After replacement, confirm that the vapor hoses and electrical connector are fully seated.
The diagnostic codes can then be cleared, but the EVAP monitor may require additional driving and vehicle-off periods before it completes its self-test.
When Should a Mechanic Test the EVAP System?
A basic multimeter and sealing test can identify many failures, but some EVAP problems require more advanced equipment.
Professional diagnosis is useful when the purge valve appears good but the trouble code keeps returning, when multiple EVAP codes are present, or when the vehicle has a persistent fuel-vapor smell.
A technician may use a bidirectional scan tool, smoke machine, electrical circuit tests, and fuel tank pressure data to evaluate the entire system.
This is often more cost-effective than replacing several EVAP components by trial and error.
FAQs About How to Test Purge Valve With Multimeter
What Should a Purge Valve Read on a Multimeter?
There is no single correct resistance for every purge valve.
Measure across the valve’s electrical terminals and compare the result with the specification for your exact vehicle and engine.
An open circuit or a reading significantly outside the specified range can indicate a faulty solenoid coil.
How Do You Test a Purge Valve Solenoid?
Start by checking solenoid resistance with a multimeter.
Then verify that the valve responds when properly commanded and check whether it opens and closes as intended.
A complete test includes both electrical and mechanical checks.
Can a Bad Purge Valve Have Correct Resistance?
Yes.
The electrical coil can be perfectly healthy while the mechanical valve is stuck or leaking.
A valve that passes the ohm test should still be checked for proper sealing if symptoms point toward a purge problem.
How Do You Test a Canister Purge Valve Without a Vacuum Pump?
Measure resistance with a multimeter, perform an appropriate activation or click test, and check whether a normally closed valve passes low-pressure air while unpowered.
A valve that allows air through when it should be sealed may be stuck open.
Should Air Pass Through a Purge Valve When It Is Disconnected?
For many normally closed purge valves, air should not flow freely through the valve when it is unpowered.
Vehicle designs vary, so confirm the normal state of the valve before using this as a diagnostic result.
Can I Test a Purge Valve With a 12-Volt Battery?
Only if the service procedure for your exact valve allows direct battery-voltage activation.
Do not automatically apply 12 volts to every purge solenoid because electrical control strategies differ between vehicles.
Does a Clicking Purge Valve Mean It Is Good?
No.
Clicking shows that the solenoid mechanism is moving, but the valve can still leak, stick partially open, or fail to seal correctly.
Combine the click test with an airflow or vacuum test.
How Do I Know if My Purge Valve Is Stuck Open?
A normally closed valve that allows airflow while unpowered may be stuck open.
Hard starting after refueling, rough idle, and abnormal fuel trims can also support the diagnosis.
Conclusion
Learning how to test purge valve with multimeter starts with checking the electrical resistance across the disconnected purge-solenoid terminals and comparing the reading with the specification for your exact vehicle.
An open circuit, abnormal resistance, or failed electrical response can reveal a bad solenoid. However, a correct resistance reading does not prove that the purge valve is mechanically healthy.
For a more reliable diagnosis, combine the multimeter test with a sealing or airflow check. If you need to test a purge valve without a vacuum pump, you can still check resistance, confirm solenoid operation, and determine whether a normally closed valve improperly passes low-pressure air while unpowered.
Testing both the electrical and mechanical sides of the purge valve helps prevent unnecessary replacement and makes it easier to separate an actual bad purge solenoid from a wiring problem, vent-valve fault, EVAP leak, or another emissions-system issue.