How to Change an Oxygen Sensor: Step-by-Step Replacement Guide
Replacing a faulty oxygen sensor is a common automotive repair that many experienced DIYers can handle with basic hand tools. The job is usually straightforward, but access can be tight because oxygen sensors are threaded directly into the exhaust system and may be difficult to remove after years of exposure to heat, rust, and road debris.
To change an oxygen sensor, identify the correct upstream or downstream sensor, disconnect the electrical connector, remove the old sensor with an oxygen-sensor socket or wrench, install the correct replacement sensor, reconnect the wiring, and verify that the repair solved the original fault.
If you are learning how to change an oxygen sensor, correct identification is especially important. Many vehicles have two, three, or four oxygen sensors, and replacing the wrong one will not fix the problem. A trouble code such as Bank 1 Sensor 1 or Bank 2 Sensor 2 tells you which location the engine computer is monitoring, but the code itself does not always prove that the sensor is defective.
This guide explains how to identify the right O2 sensor, what tools you need, how to remove a stuck sensor, how tightly to install the replacement, whether anti-seize should be used, and what to do if the check engine light returns after replacement.
How to Change an Oxygen Sensor
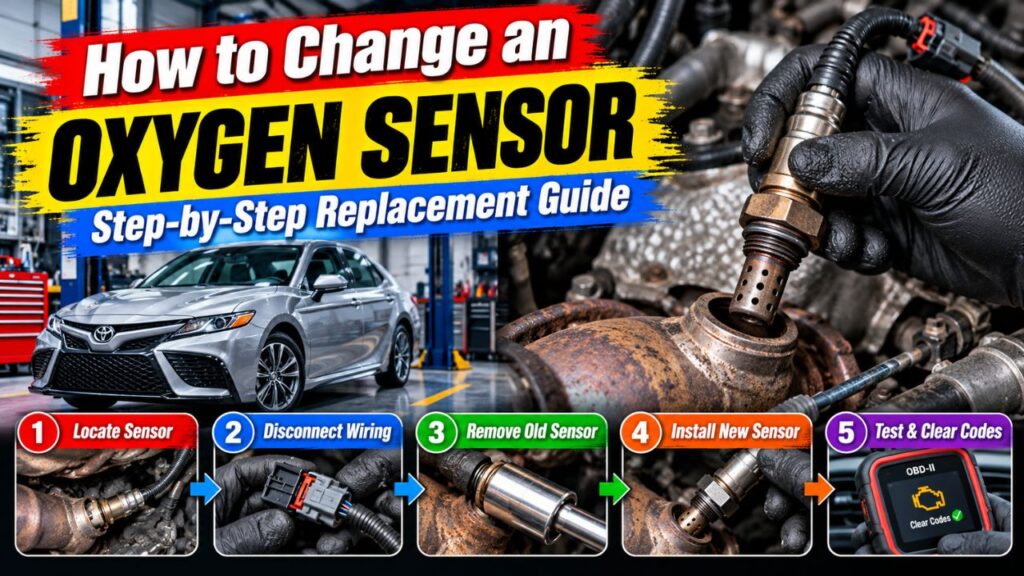
To change an oxygen sensor, first confirm which sensor needs replacement and allow the exhaust system to cool enough to work around safely. Disconnect the battery if the vehicle’s service procedure recommends it, unplug the O2 sensor connector, loosen the sensor with an oxygen-sensor socket, remove it from the exhaust, and install the exact replacement sensor.
A typical replacement involves disconnecting the sensor electrically, removing it mechanically, installing the new unit, and reconnecting everything securely.
The most important parts of the job are using the correct replacement sensor, protecting the wiring, avoiding exhaust-thread damage, and tightening the new sensor to the correct specification.
What Is an Oxygen Sensor?
An oxygen sensor, also called an O2 sensor, measures the oxygen content in the exhaust gases.
The engine control module uses this information to help manage the air-fuel mixture and monitor emissions-system performance.
Most modern vehicles have at least two oxygen sensors.
One is usually located before the catalytic converter and another after it.
Vehicles with two cylinder banks may have additional sensors on each side of the engine.
Upstream vs. Downstream Oxygen Sensor
Before removing anything, determine whether you need the upstream or downstream sensor.
Upstream Oxygen Sensor
The upstream sensor is installed before the catalytic converter.
It may be identified as:
- Sensor 1
- Bank 1 Sensor 1
- Bank 2 Sensor 1
This sensor is heavily involved in fuel-control decisions.
A bad upstream sensor may contribute to poor fuel economy, rough operation, hesitation, or incorrect fuel trims.
Downstream Oxygen Sensor
The downstream sensor is installed after the catalytic converter.
It is commonly identified as:
- Sensor 2
- Bank 1 Sensor 2
- Bank 2 Sensor 2
Its primary job on many vehicles is monitoring catalytic converter efficiency.
Replacing a downstream sensor when the upstream sensor is faulty will not solve the problem.
What Does Bank 1 and Bank 2 Mean?
On engines with more than one cylinder bank, diagnostic codes identify the sensor by bank.
Bank 1 is the side of the engine containing cylinder number 1.
Bank 2 is the opposite side.
Do not assume the driver’s side is always Bank 1.
Bank location varies by engine design.
Use reliable service information for your exact year, make, model, and engine.
Make Sure the Oxygen Sensor Is Actually Bad
Before replacing the sensor, verify that it is the cause of the problem.
An O2-related trouble code can sometimes be triggered by something other than the sensor itself.
Possible causes include:
- Damaged wiring
- Corroded connector
- Blown heater fuse
- Exhaust leak
- Vacuum leak
- Rich or lean fuel condition
- Misfire
- Oil or coolant contamination
For example, an exhaust leak ahead of the oxygen sensor can draw outside air into the exhaust and make the sensor report a lean condition.
In that case, replacing the sensor would not fix the underlying problem.
Common Oxygen Sensor Trouble Codes
O2 sensor faults often produce codes in the P0130 through P0167 range, depending on the vehicle and failure.
Common examples include:
P0130 for an oxygen-sensor circuit problem, P0133 for slow response, P0135 for a heater-circuit fault, and similar codes for additional banks or sensor positions.
Catalyst-related codes such as P0420 or P0430 should not automatically lead to oxygen-sensor replacement.
Those codes can involve the catalytic converter, exhaust leaks, engine-running problems, or sensor performance.
Tools Needed to Change an Oxygen Sensor
The exact tools depend on access and sensor location.
Common tools include an oxygen-sensor socket, ratchet, extension, wrench, penetrating lubricant, jack and jack stands if necessary, work gloves, and safety glasses.
An oxygen-sensor socket has a slot along the side so the sensor wiring can pass through while the socket fits over the sensor body.
A regular open-end wrench may work when access is good, but a dedicated O2 sensor socket usually makes the job easier.
Step 1: Park the Vehicle Safely
Park on a firm, level surface.
Shift into Park or first gear as appropriate and apply the parking brake.
If the sensor can be reached from the engine compartment, the vehicle may not need to be lifted.
If you need to work underneath, raise the vehicle only at approved lifting points and support it securely with jack stands.
Never work under a vehicle supported only by a hydraulic jack.
Step 2: Let the Exhaust Cool
Oxygen sensors thread directly into hot exhaust components.
The exhaust manifold and catalytic converter can reach temperatures capable of causing serious burns.
Allow the exhaust to cool before touching the sensor, wiring, or surrounding components.
A slightly warm exhaust can sometimes make a stubborn sensor easier to remove because the metal has expanded, but working around a hot exhaust creates burn risk.
For most beginners, working with the exhaust safely cooled is the better approach.
Step 3: Locate the Correct Oxygen Sensor
Trace the exhaust system and identify the sensor position indicated by your diagnostic information.
An oxygen sensor usually has a metal threaded body with an electrical wire leading to a connector.
Upstream sensors are often threaded into the exhaust manifold or front section of the exhaust.
Downstream sensors are usually installed after the catalytic converter.
Make sure the sensor you are about to remove matches the bank and sensor number you intend to replace.
Step 4: Inspect the Wiring Before Removal
Look at the sensor wiring and connector before unplugging anything.
Check for:
- Melted insulation
- Broken wires
- Corrosion
- Connector damage
- Wiring touching the exhaust
If the wiring harness is damaged, installing a new sensor alone may not solve the problem.
Also note how the harness is routed so the new sensor can be installed the same way.
Step 5: Disconnect the Electrical Connector
Release the locking tab and unplug the oxygen sensor connector.
Do not pull directly on the wires.
Hold the connector body and separate the two halves carefully.
Older connectors may become brittle from heat.
Avoid forcing the locking tab aggressively.
If access is difficult, a small pick or screwdriver may help release the tab, but be careful not to break the connector.
Step 6: Apply Penetrating Oil if Needed
An oxygen sensor that has been installed for years may be tightly seized in the exhaust.
Apply a small amount of suitable penetrating lubricant around the sensor threads where they enter the exhaust bung.
Allow time for the lubricant to work.
Try to keep excessive chemicals away from the electrical connector and sensor tip.
Penetrating oil helps most when corrosion is present, but it will not always free a badly seized sensor immediately.
Step 7: Install the Oxygen-Sensor Socket
Slide the oxygen-sensor socket over the sensor.
Route the sensor wire through the slot in the socket.
Attach a ratchet or breaker bar.
Make sure the socket is seated fully before applying force.
Poor engagement can round the sensor body and make removal more difficult.
Step 8: Loosen the Old Oxygen Sensor
Turn the sensor counterclockwise to loosen it.
Apply smooth, controlled pressure.
If the sensor will not move, avoid immediately applying extreme force.
A severely seized sensor can damage the threaded exhaust bung if forced.
Additional penetrating lubricant, better leverage, or controlled heating by an experienced technician may be needed.
Once the sensor breaks loose, continue turning it until it can be removed.
What If the Oxygen Sensor Is Stuck?
Stuck oxygen sensors are common because they experience thousands of heating and cooling cycles.
Rust and carbon can also contribute.
If the sensor refuses to loosen, you may try additional penetrating lubricant and allow more soaking time.
A longer breaker bar can provide more leverage, but excessive force can damage the exhaust.
Professional shops may heat the surrounding exhaust bung to help release a seized sensor.
Because fuel, wiring, rubber components, and other heat-sensitive materials may be nearby, torch use is not a beginner-level technique.
If the sensor begins rounding off or the exhaust fitting starts deforming, stop before causing more damage.
Step 9: Inspect the Exhaust Threads
After removing the sensor, inspect the threaded opening.
The threads should be clean enough for the replacement sensor to start by hand.
Do not force a new sensor into damaged threads.
If the threads contain light corrosion or carbon, a proper oxygen-sensor thread chaser may be used when appropriate.
Avoid aggressively cutting new threads unless necessary.
Removing too much material can weaken the connection.
Step 10: Compare the Old and New Sensors
Before installing the replacement, compare both parts.
Check the:
- Electrical connector
- Wire length
- Thread size
- Sensor body shape
- Connector pin arrangement
The replacement should be specifically listed for your vehicle and sensor position.
A sensor that physically threads into the exhaust is not necessarily electrically compatible.
Universal vs. Direct-Fit Oxygen Sensor
A direct-fit oxygen sensor includes the correct connector and wire length for the vehicle.
This is generally the easiest and safest option for DIY replacement.
Universal sensors may require wiring work or connector transfer.
Incorrect splicing can alter signal quality or create future reliability problems.
For most vehicle owners, a direct-fit sensor is preferable.
Step 11: Check Whether Anti-Seize Is Already Applied
Many new oxygen sensors come with anti-seize compound already applied to the threads.
If it is already present, do not add extra.
Some manufacturers provide a small packet of approved anti-seize.
Others specifically instruct installers to use the sensor exactly as supplied.
Never allow anti-seize compound to contact:
- Sensor tip
- Vent openings
- Electrical connector
Contaminating the sensing element can damage the new sensor.
Should You Put Anti-Seize on an Oxygen Sensor?
Only when the sensor manufacturer recommends it.
Many replacement O2 sensors have treated or pre-coated threads.
Adding extra lubricant when it is not needed can affect installation torque.
Follow the instructions supplied with the sensor.
Do not use ordinary grease.
Step 12: Start the New Sensor by Hand
Thread the replacement sensor into the exhaust by hand first.
This is one of the most important steps.
It should turn smoothly for several rotations.
If it binds immediately, stop.
The sensor may be cross-threaded or the threads may be damaged.
Starting by hand reduces the chance of damaging the exhaust bung.
Step 13: Tighten the Oxygen Sensor
Once the sensor is fully threaded by hand, tighten it with the oxygen-sensor socket.
Use the torque specification provided by the vehicle or sensor manufacturer when available.
Do not assume every oxygen sensor uses the same torque value.
Overtightening can:
- Damage threads
- Distort the sensor
- Make future removal difficult
Undertightening can allow exhaust leakage around the sensor.
Step 14: Route the Wiring Correctly
Route the new sensor wire in the same general path as the original.
Keep it away from:
- Exhaust pipes
- Exhaust manifolds
- Driveshafts
- CV axles
- Steering components
- Belts
- Fans
Use the factory clips or retainers.
Do not leave excess wiring hanging near moving or hot components.
Step 15: Reconnect the Electrical Connector
Push the sensor connector into the vehicle harness until the locking tab engages securely.
Do not force incompatible connectors together.
Give the connection a light pull to confirm it is locked.
Make sure no wiring is pinched or stretched.
Step 16: Lower the Vehicle if Necessary
If you raised the vehicle, make sure all tools and equipment are removed from underneath.
Lower the vehicle according to safe lifting procedures.
Remove the wheel chocks only when appropriate.
Step 17: Start the Engine
Start the vehicle and let it idle.
Listen for an exhaust leak around the new sensor.
Watch for abnormal engine behavior.
If the engine runs normally, allow it to reach operating temperature as appropriate.
Do You Need to Clear the Check Engine Light?
A stored oxygen-sensor code may not disappear immediately after replacement.
You can often clear the code using an OBD-II scan tool after the repair.
Alternatively, some vehicles may turn the check engine light off automatically after the computer completes enough successful drive cycles without detecting the fault again.
Clearing codes should only be done after the underlying problem has been repaired.
Do not use code clearing as a substitute for diagnosis.
Should You Disconnect the Battery to Reset the O2 Sensor?
Usually, disconnecting the battery is unnecessary merely to replace or “reset” an oxygen sensor.
The sensor itself does not require a manual reset.
Disconnecting the battery can also erase:
- Radio settings
- Clock settings
- Learned idle values
- Other vehicle memory
Some vehicles may require special procedures after battery disconnection.
Using a scan tool to clear codes is generally more controlled when code clearing is actually needed.
How Long Does Oxygen Sensor Replacement Take?
On a vehicle with easy access and a sensor that removes normally, replacement may take around 30 minutes to an hour.
The job can take much longer if:
- The sensor is seized.
- Access is restricted.
- Rust is severe.
- Exhaust components must be moved.
- Wiring is damaged.
Some upstream sensors are buried near the firewall or behind engine components and are significantly more difficult to reach.
Can You Drive Immediately After Replacing an Oxygen Sensor?
Usually, yes, once the sensor is correctly installed, the connector is secure, and there are no exhaust leaks or other unresolved problems.
The engine computer will begin using the new sensor when operating conditions allow.
Fuel trims may take some driving time to stabilize if the old sensor had caused incorrect corrections.
What If the Check Engine Light Comes Back?
If the same trouble code returns after replacing the oxygen sensor, do not automatically install another sensor.
Possible explanations include:
- Damaged wiring
- Faulty connector
- Heater fuse problem
- Exhaust leak
- Vacuum leak
- Rich or lean engine condition
- Incorrect replacement sensor
- Catalytic converter problem
The original sensor may never have been the actual cause.
Use the returning code as a reason to continue diagnosis.
What If the New Oxygen Sensor Does Not Fix Poor Fuel Economy?
A bad upstream O2 sensor can contribute to poor fuel economy, but many other problems can do the same.
Possible causes include:
- Low tire pressure
- Misfires
- Dirty air filter
- Faulty mass airflow sensor
- Fuel injector issues
- Thermostat problem
- Excessive fuel pressure
- Driving conditions
If fuel economy does not improve, check fuel-trim data and other engine parameters rather than replacing additional oxygen sensors without evidence.
Can You Replace Only One Oxygen Sensor?
Yes.
Oxygen sensors do not normally need to be replaced as a complete set.
If one sensor is confirmed faulty and the others are operating correctly, replacing only the failed sensor is acceptable.
However, high-mileage sensors may age at similar rates, so another original sensor could fail later.
That does not mean preventive replacement of every sensor is always necessary.
Should You Replace Upstream and Downstream Sensors Together?
Usually, no.
They perform different functions and can fail independently.
Replace whichever sensor has actually been diagnosed as faulty.
If multiple sensors have problems, each should be evaluated individually.
Common Mistakes When Changing an Oxygen Sensor
One common mistake is replacing the sensor indicated in a code without confirming that the sensor itself has failed.
Another is confusing Bank 1 with Bank 2 or Sensor 1 with Sensor 2.
Installing the wrong sensor position wastes time and money.
Cross-threading is another major risk. Always start the new sensor by hand.
Finally, avoid allowing the wiring to touch the exhaust. Even a correctly installed new sensor can fail quickly if its harness melts against a hot pipe.
Can You Change an Oxygen Sensor Without a Special Socket?
Sometimes.
If there is enough access, an open-end wrench may remove the sensor.
However, a dedicated oxygen-sensor socket is usually much easier because it surrounds more of the sensor body while allowing the wiring to pass through.
It also reduces the chance of slipping compared with a poorly positioned wrench.
Is Replacing an Oxygen Sensor a Beginner-Friendly Repair?
It can be, depending on sensor location.
A downstream sensor in an easily accessible exhaust pipe may be relatively straightforward.
An upstream sensor located behind the engine or near a hot exhaust manifold can be much more difficult.
The job becomes less beginner-friendly when:
- The sensor is badly seized.
- The vehicle needs to be raised.
- Access is extremely limited.
- Threads are damaged.
- Wiring repairs are needed.
If safe access or proper diagnosis is uncertain, professional replacement is reasonable.
FAQs About How to Change an Oxygen Sensor
How do you change an oxygen sensor?
Identify the correct sensor, disconnect its electrical connector, remove it from the exhaust using an oxygen-sensor socket, install the correct replacement sensor, tighten it to specification, reconnect the wiring, and verify that the fault is gone.
Do you have to disconnect the battery to change an oxygen sensor?
Not always.
Follow the vehicle manufacturer’s service procedure. Disconnecting the sensor connector with the ignition off is sufficient on many vehicles, but some procedures may recommend battery disconnection.
Do oxygen sensors need anti-seize?
Many new sensors come with anti-seize already applied.
Only add it if the sensor manufacturer specifically recommends doing so.
Keep anti-seize away from the sensor tip and electrical components.
How hard is it to replace an oxygen sensor?
Difficulty ranges from easy to difficult depending on access and corrosion.
An easily reached downstream sensor may be simple, while a seized upstream sensor near the firewall can be challenging.
Can I replace an oxygen sensor myself?
Yes, if you can safely access the sensor, identify the correct one, and remove it without damaging the exhaust threads.
Use proper lifting equipment if working underneath the vehicle.
Do I need a special oxygen-sensor socket?
It is not always mandatory, but it is highly useful.
The slotted design allows the wiring to pass through while the socket grips the sensor.
How long does it take to change an oxygen sensor?
A straightforward replacement may take 30–60 minutes.
A seized or difficult-to-access sensor can take considerably longer.
Will the check engine light go away after replacing the oxygen sensor?
It may turn off after successful drive cycles, or you can clear the stored code with a scan tool after confirming the repair.
If the code returns, further diagnosis is needed.
Conclusion
Learning how to change an oxygen sensor is mostly about identifying the correct sensor, working safely around the exhaust system, and preventing thread or wiring damage. Once the faulty upstream or downstream sensor has been confirmed, disconnect the connector, remove the old sensor with the appropriate tool, install the correct direct-fit replacement, tighten it properly, and route the wiring away from heat and moving parts.
The most important part of the repair is diagnosis. An oxygen-sensor trouble code does not always mean the sensor itself is bad; wiring faults, exhaust leaks, heater-circuit problems, vacuum leaks, or abnormal fuel mixtures can create similar codes. Confirming the cause before replacing parts reduces the chance of the same check engine light returning.
For an accessible sensor that is not seized, this can be a manageable DIY repair. If the sensor is severely rusted, difficult to reach, cross-threaded, or surrounded by damaged exhaust hardware, professional replacement may prevent a relatively simple repair from turning into an expensive exhaust-system problem.