How to Repair an Oxygen Sensor: What Can and Cannot Be Fixed
An oxygen sensor can trigger a check engine light, poor fuel economy, rough running, or emissions problems when its signal is no longer accurate. That often leads vehicle owners to wonder whether the sensor can be cleaned or repaired instead of replaced.
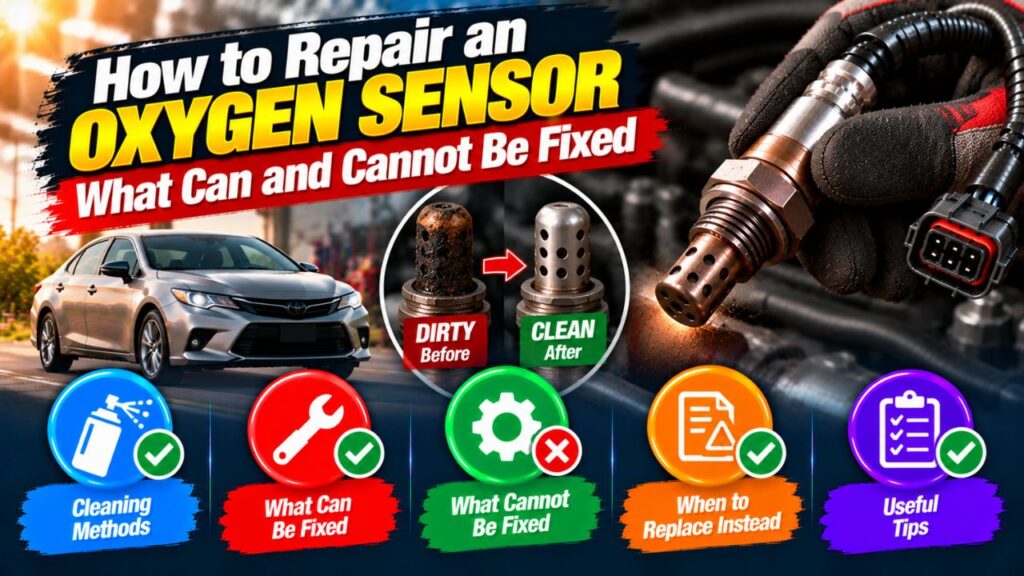
In most cases, a failed oxygen sensor itself cannot be reliably repaired. However, damaged wiring, loose connectors, blown heater fuses, exhaust leaks, and other problems around the sensor can sometimes be repaired without replacing the sensor.
Understanding how to repair an oxygen sensor therefore starts with finding out whether the sensor is actually defective. An oxygen-sensor trouble code does not automatically mean the sensing element has failed. The real problem may be a broken wire, corroded electrical connection, failed heater circuit supply, exhaust leak, or engine condition that is causing abnormal sensor readings.
If testing confirms that the internal sensing element or heater inside the sensor has failed, replacement is normally the correct repair. Oxygen sensors are sealed precision components and are not designed to be opened, rebuilt, or internally serviced.
This guide explains which oxygen sensor problems can be repaired, which require replacement, how to diagnose the fault, and how to avoid replacing a good sensor unnecessarily.
How to Repair an Oxygen Sensor
The correct way to repair an oxygen sensor depends on what has failed.
If the problem is outside the sensor, you may be able to repair the wiring, connector, fuse, exhaust leak, or related engine problem.
If the sensor’s internal sensing element or built-in heater has failed, the sensor generally needs replacement.
A practical diagnosis usually follows this order:
- Read the diagnostic trouble codes.
- Identify the exact oxygen sensor involved.
- Inspect the wiring and connector.
- Check for exhaust leaks.
- Test the sensor and heater circuit.
- Check for engine problems that could affect sensor readings.
- Repair external faults or replace the sensor if it has internally failed.
This approach is more reliable than replacing the sensor immediately after seeing an O2-related code.
Can an Oxygen Sensor Actually Be Repaired?
Usually, the sensor itself cannot.
Modern oxygen sensors contain sensitive ceramic sensing elements and, in many cases, an internal electric heater. These components are sealed inside the sensor housing.
If the internal element becomes contaminated, cracked, electrically open, or too slow to respond, there is normally no practical repair procedure.
The complete sensor is replaced.
What can often be repaired are the components around it.
For example, a sensor may appear faulty because of:
- Broken wiring
- Melted insulation
- Corroded connector terminals
- Loose electrical connection
- Blown heater fuse
- Exhaust leak
- Damaged ground
- Engine running excessively rich or lean
Finding the actual cause first can save you from replacing a perfectly good sensor.
Start With the Trouble Code
Use an OBD-II scanner to read stored diagnostic trouble codes.
Oxygen-sensor-related codes may refer to:
- Sensor circuit
- Heater circuit
- Slow response
- High voltage
- Low voltage
- No activity
- Fuel mixture
The wording matters.
For example, a heater circuit code does not necessarily mean the sensing portion of the oxygen sensor is bad. A blown fuse or broken heater wire could produce the same type of fault.
Similarly, a lean code does not automatically mean the oxygen sensor is defective.
The sensor may simply be reporting an actual lean condition.
Identify the Correct Oxygen Sensor
Modern vehicles can have several oxygen sensors.
Before doing any repair, determine which sensor the trouble code refers to.
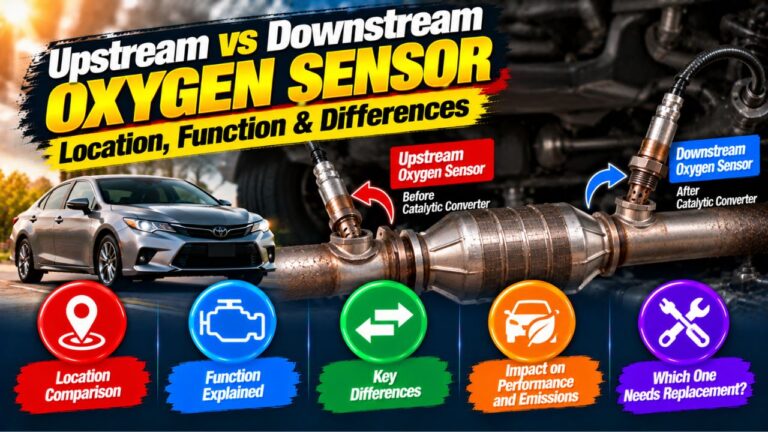
The two common position terms are:
Sensor 1: located before the catalytic converter.
Sensor 2: located after the catalytic converter.
Vehicles with V-type engines may also identify sensors by bank.
Bank 1 is the side containing cylinder number 1.
Bank 2 is the opposite side.
For example, “Bank 1 Sensor 2” means the downstream oxygen sensor on the bank containing cylinder 1.
Replacing the wrong sensor will not fix the problem.
Inspect the Oxygen Sensor Wiring
Wiring problems are among the most repairable oxygen-sensor faults.
Oxygen sensor wiring runs close to very hot exhaust components, so the insulation can become damaged over time.
Look carefully for:
- Melted insulation
- Chafed wires
- Broken conductors
- Wires touching the exhaust
- Loose connectors
- Corrosion inside connectors
- Oil or coolant contamination
A damaged wire can interrupt the sensor signal or heater circuit.
If the wiring is damaged but the sensor itself tests correctly, repairing the harness may restore normal operation.
How to Repair Damaged Oxygen Sensor Wiring
If the vehicle-side harness is damaged, the wiring may be repairable using proper automotive wiring techniques.
The repair should use:
- Correct wire gauge
- Heat-resistant automotive wire
- Proper crimp or soldered connections where appropriate
- Heat-shrink insulation
- Secure routing away from the exhaust
Do not twist bare wires together and cover them with ordinary household tape.
The repair must tolerate:
- Engine vibration
- Moisture
- Heat
- Road contamination
Also be careful around the sensor’s own pigtail wiring. Some oxygen sensor circuits are sensitive to resistance changes, and manufacturer-specific repair instructions should be followed.
Check the Connector
Disconnect the oxygen sensor connector only after the exhaust system has cooled.
Inspect the terminals for:
- Green corrosion
- Bent pins
- Burn marks
- Loose terminals
- Water intrusion
A connector that does not lock securely can cause intermittent sensor signals.
Sometimes cleaning or repairing the connector is enough to solve the problem.
Use electrical contact cleaner intended for automotive connectors if cleaning is appropriate.
Do not pack the connector with random grease or chemicals unless the vehicle manufacturer specifies them.
Check the Oxygen Sensor Heater Circuit
Most modern oxygen sensors include an internal heater.
The heater allows the sensor to reach operating temperature quickly after startup.
If the heater circuit fails, the sensor may take too long to begin working and the engine computer may store a trouble code.
The heater circuit generally includes:
- Power supply
- Fuse
- Wiring
- Ground or computer-controlled ground
- Heater element inside the sensor
Before replacing the sensor, check whether power is actually reaching the heater.
A blown fuse or broken wire can make a good sensor appear bad.
Can the Heater Inside an Oxygen Sensor Be Repaired?
No, not practically.
If testing confirms that the internal heater element is open or shorted, the oxygen sensor usually needs to be replaced.
The heater is built into the sensor assembly and is not a serviceable part.
Repairing the wiring outside the sensor is different from repairing the heater inside it.
Check for Exhaust Leaks
An exhaust leak can make an oxygen sensor appear faulty even when the sensor itself is working correctly.
This is especially important for an upstream oxygen sensor.
If outside air enters the exhaust before or near the sensor, the sensor may detect extra oxygen and report a lean condition.
Possible leak locations include:
- Exhaust manifold gasket
- Cracked exhaust manifold
- Flex pipe
- Exhaust flange
- Cracked pipe
Repairing the exhaust leak may restore normal sensor readings without replacing the sensor.
Check for Vacuum Leaks
A vacuum leak can create a genuinely lean air-fuel mixture.
The oxygen sensor then reports that lean condition correctly.
The real problem may be:
- Cracked intake hose
- PCV system leak
- Intake manifold gasket leak
- Brake booster vacuum leak
- Disconnected vacuum hose
Replacing the O2 sensor in this situation will not fix the lean condition.
Fuel-trim data can help identify whether a vacuum leak is affecting the engine.
Check for Engine Misfires
A misfire can confuse oxygen sensor diagnosis.
When a cylinder misfires, oxygen that was not consumed during combustion enters the exhaust stream.
The oxygen sensor may detect that extra oxygen and report a lean condition.
The real cause could be:
- Bad spark plug
- Failed ignition coil
- Fuel injector problem
- Compression loss
- Vacuum leak
If the engine is misfiring, fix the misfire before assuming the oxygen sensor is bad.
A persistent misfire can also damage the catalytic converter and oxygen sensors through excessive heat.
Check for Rich Running
An engine that runs excessively rich can contaminate or overheat the oxygen sensor.
Possible causes include:
- Leaking injector
- Excessive fuel pressure
- Faulty mass airflow sensor
- Bad coolant temperature sensor
- Restricted air intake
If the sensor is replaced without correcting the rich condition, the new sensor may also fail prematurely.
Check for Oil or Coolant Contamination
Oil and coolant can poison an oxygen sensor.
If the engine burns oil, the sensor may become coated with deposits.
If coolant enters the combustion chamber, additives in the coolant can contaminate the sensing element.
Possible underlying problems include:
- Worn piston rings
- Valve stem seal wear
- Turbocharger oil leakage
- Head gasket failure
- Cracked cylinder head
A contaminated oxygen sensor usually cannot be restored reliably.
The sensor may need replacement, but the engine problem should also be repaired.
Can You Clean an Oxygen Sensor Instead of Replacing It?
Cleaning is generally not a reliable oxygen sensor repair.
Oxygen sensors are precision components, and contamination often affects the internal sensing surface.
Spraying the sensor with chemicals or soaking it may not restore its original response.
Aggressive cleaning can also damage it.
Avoid methods involving:
- Carburetor cleaner
- Brake cleaner
- Gasoline soaking
- Wire brushing
- Burning deposits off with a torch
Even if the sensor temporarily appears to work afterward, its accuracy may still be compromised.
If testing proves the sensor is internally defective, replacement is more reliable.
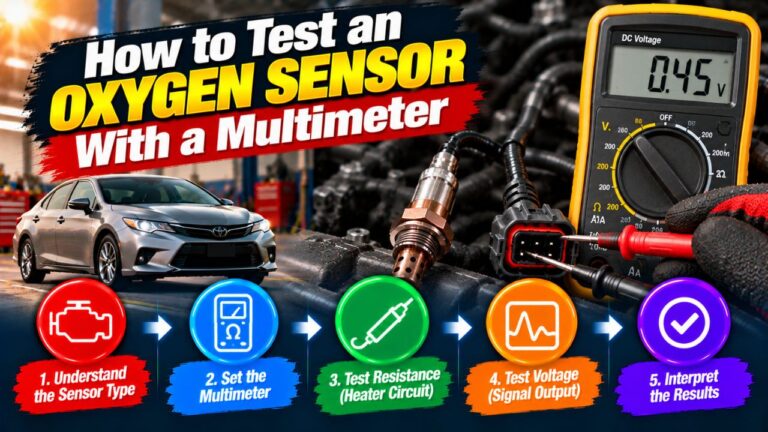
How to Test the Oxygen Sensor Before Replacing It
Testing depends on whether the vehicle uses a conventional narrowband oxygen sensor or a wideband air-fuel ratio sensor.
They do not produce the same type of signal.
For many vehicles, a scan tool is the easiest way to evaluate sensor behavior.
The engine should usually be fully warmed so the system is operating in closed loop.
Look for whether the sensor:
- Responds to changing engine conditions
- Is stuck at an abnormal value
- Responds too slowly
- Shows a heater fault
- Agrees with fuel-trim behavior
Do not apply old narrowband voltage-testing rules blindly to a wideband sensor.
Use service information appropriate to the vehicle.
What Does a Slow Oxygen Sensor Mean?
An aging sensor may still produce a signal but react too slowly to exhaust changes.
The engine computer expects the upstream sensor to respond within a certain time.
A sluggish sensor may cause:
- Poor fuel control
- Increased emissions
- Reduced fuel economy
- Check engine light
If wiring and engine conditions are normal and the sensor consistently responds too slowly, replacement is normally the proper repair.
When Oxygen Sensor Replacement Is Necessary
Replacement is generally required when testing confirms:
- Failed internal heater
- No sensor response
- Internal electrical open circuit
- Sensor response too slow
- Cracked sensor body
- Severe contamination
- Physically damaged sensor
- Failed sensing element
At that point, external repairs will not restore the sensor.
How to Replace a Bad Oxygen Sensor
If replacement is necessary, allow the exhaust to cool enough to work safely.
Disconnect the battery only if the vehicle service procedure requires it.
Locate the correct sensor and disconnect its electrical connector.
Use an appropriate oxygen sensor socket or wrench to loosen the sensor.
Some sensors can be difficult to remove because of heat and corrosion.
After removing the old sensor, compare it carefully with the replacement.
Check:
- Connector
- Wire length
- Thread size
- Sensor design
Install the replacement according to the manufacturer’s instructions and torque specification.
Reconnect the wiring and route it exactly where it will stay away from the exhaust.
Should You Use Anti-Seize on Oxygen Sensor Threads?
Many new oxygen sensors come with the correct anti-seize compound already applied to the threads.
If so, do not add additional compound unless instructed.
Too much anti-seize can contaminate the sensor.
If the sensor manufacturer specifies adding anti-seize, apply only the approved product and keep it away from the sensing tip.
Always follow the instructions supplied with the replacement sensor.
Do You Need a Special Oxygen Sensor Socket?
Not always, but an oxygen sensor socket can make removal much easier.
These sockets have a slot that allows the sensor wiring to pass through.
A regular wrench may work when there is enough access.
For sensors in tight areas, the correct socket and extension can prevent damage to both the sensor and surrounding components.
What If the Oxygen Sensor Is Stuck?
Oxygen sensors can become extremely tight after years of heat cycles and corrosion.
If the sensor will not loosen, first make sure you are turning it in the correct direction and using the correct tool.
Penetrating oil around the threaded area may help after the exhaust has cooled, depending on access and manufacturer guidance.
Avoid excessive force that could damage the exhaust bung.
If the threads begin to strip or the bung starts twisting, professional assistance may prevent a much more expensive exhaust repair.
What If the Oxygen Sensor Threads Are Damaged?
The sensor screws into a threaded fitting, commonly called a bung, welded into the exhaust system.
If those threads are damaged, the new sensor may not tighten correctly.
Depending on the damage, repair may involve:
- Cleaning the threads
- Using an appropriate thread-restoring tool
- Replacing the bung
- Repairing or replacing the exhaust section
This repair requires care because the sensor must seal properly while remaining positioned correctly in the exhaust stream.
Clear the Trouble Code After Repair
After repairing the problem, clear the diagnostic trouble code with a scan tool if appropriate.
Then drive the vehicle and allow the engine computer to run its normal monitors.
Do not assume the repair is successful simply because the check engine light turns off immediately.
Confirm that:
- The code does not return.
- Fuel trims are reasonable.
- Sensor data looks normal.
- The engine runs properly.
Some monitors require several drive cycles before completion.
Why a New Oxygen Sensor May Not Fix the Problem
If a new sensor does not solve the original code, the underlying issue may have been elsewhere.
Common possibilities include:
- Wiring damage
- Exhaust leak
- Vacuum leak
- Fuel injector problem
- Misfire
- Engine mechanical problem
- Catalytic converter issue
- Incorrect replacement sensor
This is why diagnosis should come before replacement whenever possible.
Universal vs Direct-Fit Oxygen Sensors
A direct-fit oxygen sensor includes the correct connector and wiring configuration for a specific application.
A universal sensor may require splicing wires.
For many DIY repairs, direct-fit sensors reduce the chance of wiring mistakes.
If a universal sensor is used, follow the manufacturer’s wiring instructions exactly.
Wire colors are not always standardized between brands, so do not simply match colors without checking the wiring diagram.
Can You Repair an Oxygen Sensor Without Replacing It?
Sometimes you can repair the overall oxygen sensor problem without replacing the sensor.
For example, you may fix:
- Broken wire
- Loose connector
- Heater circuit fuse
- Exhaust leak
- Vacuum leak
and restore normal sensor operation.
But if the sealed internal sensor element has failed, there is no practical repair that returns it to factory condition.
Replacement is the correct solution.
Common Mistakes When Repairing Oxygen Sensor Problems
One of the most common mistakes is replacing the sensor simply because its name appears in a diagnostic trouble code.
A code tells you what the computer detected, not necessarily which physical part caused it.
Another mistake is trying to clean a contaminated sensor instead of finding the cause of the contamination.
Installing a replacement without correcting oil burning, coolant leakage, rich operation, or misfires can shorten the life of the new sensor.
Finally, avoid damaging the wiring during installation. Oxygen sensor leads must be routed away from hot exhaust surfaces and moving components.
FAQs About How to Repair an Oxygen Sensor
Can a Bad Oxygen Sensor Be Repaired?
The internal sensor usually cannot be repaired.
However, damaged wiring, connectors, fuses, and exhaust leaks around the sensor may be repairable.
Can You Clean an Oxygen Sensor to Fix It?
Cleaning is generally not a reliable repair.
Once the sensing element becomes contaminated or worn, replacement is usually the better solution.
Can Oxygen Sensor Wiring Be Repaired?
Yes, vehicle-side wiring can often be repaired using proper heat-resistant automotive wiring and connections.
Follow the manufacturer’s wiring procedure because oxygen sensor circuits can be sensitive.
Can You Fix an Oxygen Sensor Heater?
If the problem is a fuse, power supply, ground, or external wire, that can be repaired.
If the heater element inside the sensor has failed, replace the sensor.
Will an Exhaust Leak Cause an Oxygen Sensor Code?
Yes.
Outside air entering the exhaust near an upstream sensor can create misleading lean readings and trigger related trouble codes.
Can a Bad Connector Make an O2 Sensor Look Faulty?
Yes.
Corrosion, loose terminals, or damaged wiring can interrupt both sensor and heater circuits.
Should I Replace an Oxygen Sensor Just Because There Is a Code?
No.
Read the code, inspect the wiring and exhaust, and test sensor operation before replacing it whenever possible.
Can a New Oxygen Sensor Fail Again Quickly?
Yes.
If oil burning, coolant leakage, rich running, misfires, wiring problems, or other underlying conditions are not repaired, a new oxygen sensor can fail prematurely.
Conclusion
The overall verdict on how to repair an oxygen sensor is that the sensor itself is usually not rebuildable, but many problems that appear to be oxygen sensor failures can be repaired without replacing it. Damaged wiring, corroded connectors, failed heater-circuit power, vacuum leaks, and exhaust leaks can all create O2-related trouble codes while the sensing element remains functional.
The correct approach is to diagnose the entire circuit first. Identify the exact sensor, inspect the wiring and connector, check the heater circuit, look for exhaust leaks, and consider misfires, rich or lean operation, oil burning, and coolant contamination. If one of those external problems is responsible, repair it and confirm that the sensor responds normally afterward.
If testing shows that the internal sensing element is slow, contaminated, physically damaged, or electrically failed—or that its built-in heater is defective—replacement is the proper repair. Fixing the underlying cause at the same time is essential, because simply installing a new oxygen sensor will not solve a problem that originates elsewhere in the engine or exhaust system.