What to Do After Replacing Oxygen Sensor: Next Steps and Checks
After replacing an oxygen sensor, reconnect everything correctly, clear stored trouble codes if appropriate, start the engine, check for exhaust or wiring problems, and complete a normal drive cycle so the engine computer can verify that the repair worked.
Knowing what to do after replacing oxygen sensor is important because installing the new sensor is only part of the repair. The engine control module still needs to see a normal sensor signal, fuel trims may need time to stabilize, and emissions monitors may need several drive cycles before they return to a ready status.
You should also verify that the original problem is actually gone. An oxygen-sensor code can sometimes be caused by an exhaust leak, damaged wiring, a vacuum leak, rich or lean fuel conditions, or a failing catalytic converter. If the check engine light comes back shortly after replacement, the new sensor may not be the problem.
The best approach is to inspect the installation, verify live sensor operation if you have a scan tool, drive the vehicle normally, and watch for returning symptoms or diagnostic trouble codes.
What to Do After Replacing Oxygen Sensor
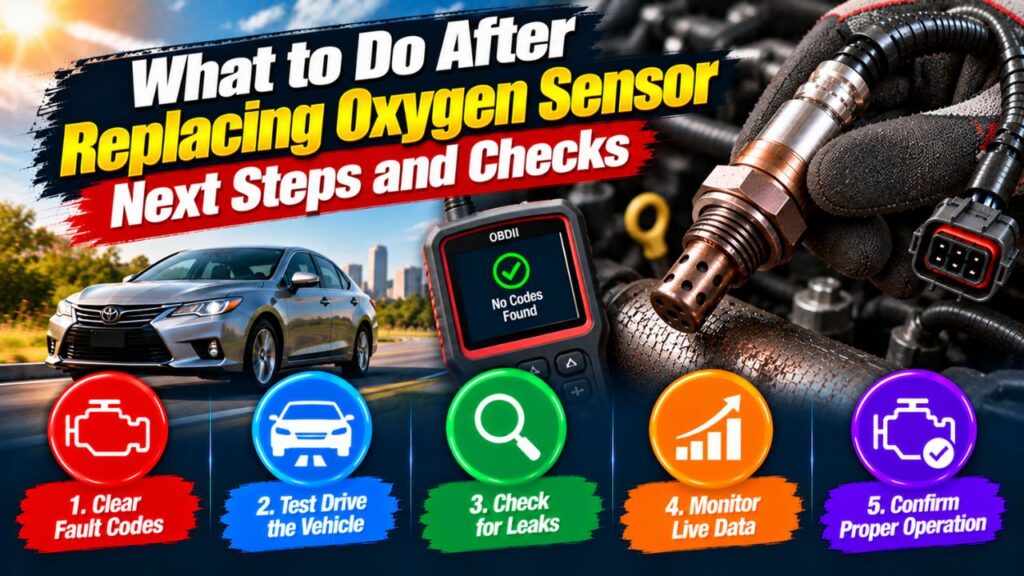
After replacing the sensor, make sure the electrical connector is fully seated, the wiring is routed away from the exhaust, and the sensor is tightened correctly. Then start the engine and check for warning lights, exhaust leaks, rough running, or unusual smells.
If you used a scan tool during diagnosis, you can clear the old diagnostic trouble codes after the repair. The vehicle will then begin monitoring the new sensor and rebuilding emissions readiness data as you drive.
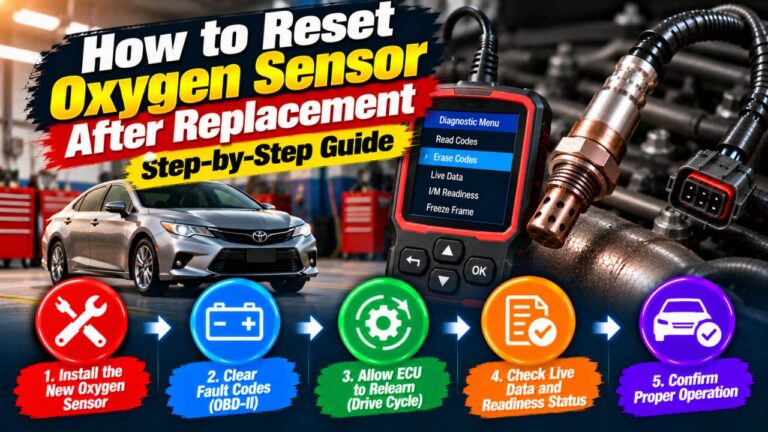
A typical post-replacement process is:
- Confirm the sensor connector is locked in place.
- Check that the wiring is not touching hot exhaust parts.
- Start the engine and listen for exhaust leaks.
- Clear old codes if necessary.
- Let the engine reach normal operating temperature.
- Drive normally under mixed conditions.
- Recheck for pending or stored trouble codes.
You do not normally need a special break-in procedure for a new oxygen sensor.
Make Sure the Sensor Was Installed Correctly
Before focusing on scan-tool data or drive cycles, verify the physical installation.
The oxygen sensor should be fully threaded into its mounting location and tightened according to the vehicle or sensor manufacturer’s specification.
Do not overtighten it. Exhaust components can be damaged if excessive force is used.
Also check the electrical connector carefully. A connector that looks attached but is not fully locked can create an intermittent fault.
The sensor harness should not:
- Touch the exhaust manifold
- Rest against the catalytic converter
- Rub against sharp metal edges
- Hang close to rotating components
Oxygen-sensor wiring is designed to tolerate heat, but direct contact with hot exhaust components can quickly damage the insulation.
Should You Clear the Check Engine Light?
If the old oxygen-sensor fault turned on the check engine light, clearing the stored code after completing the repair is usually appropriate.
A scan tool can erase the code and turn off the light if there are no active problems.
However, clearing codes also resets many emissions readiness monitors.
That means the vehicle may show monitors as not ready until it has been driven through enough operating conditions for the computer to rerun its self-tests.
If you are preparing for an emissions inspection, do not clear codes immediately before the test and expect the vehicle to pass. The monitors may need time to become ready again.
Will the Check Engine Light Turn Off by Itself?
Sometimes.
If the fault is fully corrected, the engine computer may eventually determine that the problem is no longer present and turn off the check engine light after a number of successful drive cycles.
The exact logic varies by vehicle.
Using a scan tool allows you to clear the code immediately after the repair, but you should only do that once you are reasonably confident that the underlying problem has been fixed.
Do You Need to Disconnect the Battery?
Usually, no.
Disconnecting the battery is not normally required after replacing an oxygen sensor.
A scan tool is a better way to clear trouble codes because battery disconnection can reset other learned values and vehicle settings.
Depending on the vehicle, disconnecting the battery may affect:
- Clock settings
- Radio presets
- Idle adaptation
- Transmission learning
- Window or sunroof initialization
- Emissions readiness monitors
Unless the service procedure specifically calls for battery disconnection, it is usually unnecessary.
Start the Engine and Let It Warm Up
After installation, start the engine and let it reach normal operating temperature.
Oxygen sensors need to be hot before they provide their normal operating signal.
Modern sensors contain built-in heaters that help them warm up quickly.
While the engine is warming, pay attention to:
- Rough idle
- Exhaust noise
- Warning lights
- Burning smells
- Smoke near the sensor area
A slight odor from oils or penetrating lubricant used during removal may occur briefly if residue reached the exhaust, but persistent smoke or a strong burning smell should be investigated.
Check for Exhaust Leaks
An exhaust leak near the oxygen sensor can create misleading readings.
Outside air can enter the exhaust stream and make the sensor report more oxygen than expected.
This can cause the computer to interpret the mixture as lean.
Inspect the area around:
- Sensor threads
- Exhaust manifold
- Flanges
- Gaskets
- Flex pipe
- Nearby exhaust joints
A ticking sound from the exhaust, especially during a cold start, may indicate a leak.
If you replaced an oxygen sensor but left an exhaust leak unresolved, the same trouble code may return.
Check the Sensor Wiring
Wiring problems are a common reason an O2 code remains after sensor replacement.
Inspect the harness for:
- Burned insulation
- Broken wires
- Corrosion
- Loose terminals
- Damaged connectors
- Incorrect routing
The oxygen-sensor heater circuit is especially important because a damaged wire can prevent the new sensor from reaching operating temperature correctly.
Replacing the sensor will not fix a wiring fault.
Let the Engine Computer Relearn Fuel Control
The engine control module continuously adjusts fuel delivery based on information from several sensors, including the upstream oxygen or air-fuel ratio sensor.
After replacing a faulty sensor, short-term and long-term fuel trims may gradually change as the computer receives accurate information again.
You do not usually need to perform a special relearn.
Normal driving allows the ECM to adapt.
If the previous sensor was significantly inaccurate, you may notice the engine gradually becoming smoother or fuel trims moving closer to normal.
Should You Reset Fuel Trims?
Usually, clearing diagnostic trouble codes with a scan tool may also reset some learned fuel-trim values, depending on the vehicle.
A separate manual fuel-trim reset is not normally required unless the manufacturer specifies one.
If the old sensor caused severe incorrect fuel corrections, resetting adaptations may help the ECM relearn more quickly, but this should be done using the appropriate service procedure.
For most owners, normal driving is sufficient.
Drive the Vehicle Normally
After confirming there are no obvious problems, take the vehicle for a normal drive.
A useful drive includes a mixture of:
- Idle
- Low-speed driving
- Steady cruising
- Moderate acceleration
- Deceleration
You do not need to drive aggressively.
The goal is simply to allow the engine computer to observe the sensor under different operating conditions.
This also allows fuel trims and emissions monitors to update.
How Long Should You Drive After Replacing an O2 Sensor?
There is no single mileage that works for every vehicle.
Some faults can be verified within a short drive, while certain emissions monitors may require multiple trips and specific operating conditions.
Rather than focusing on a fixed number of miles, look for:
- No returning check engine light
- No pending sensor codes
- Normal engine operation
- Reasonable fuel trims
- Emissions monitors gradually becoming ready
If you have a scan tool, you can monitor readiness status directly.
What Is a Drive Cycle?
A drive cycle is a sequence of operating conditions that allows the vehicle’s computer to run emissions self-tests.
A typical drive cycle may include combinations of:
- Cold start
- Idle
- City-speed driving
- Steady highway cruising
- Deceleration
- Warm engine operation
There is no universal drive cycle for every vehicle.
Manufacturers may have specific conditions for each emissions monitor.
If you need the vehicle ready for an emissions test, manufacturer-specific drive-cycle information may be helpful.
Check Live Oxygen-Sensor Data
If you have an OBD-II scan tool with live data, checking the new sensor is one of the best ways to confirm that the repair worked.
For a traditional upstream narrowband oxygen sensor, the signal should normally respond as the engine computer adjusts the mixture during closed-loop operation.
A downstream sensor usually behaves more steadily if the catalytic converter is working properly.
However, not all vehicles use traditional narrowband sensors.
Many modern engines use wideband air-fuel ratio sensors, which operate differently.
Do not compare a wideband sensor to old-style narrowband voltage expectations.
Use the correct specifications for the vehicle.
Check Short-Term and Long-Term Fuel Trims
Fuel trims can reveal whether the engine is still correcting for a rich or lean condition.
Short-term fuel trim changes quickly as the computer adjusts fuel.
Long-term fuel trim reflects corrections learned over a longer period.
Large positive corrections may indicate the engine is compensating for a lean condition.
Large negative corrections may indicate the computer is removing fuel because the engine is running rich.
If abnormal trims remain after replacing the O2 sensor, the original problem may be elsewhere.
Possible causes include vacuum leaks, fuel-pressure problems, leaking injectors, airflow-sensor faults, or exhaust leaks.
Do Not Assume the New Sensor Fixed the Original Problem
This is especially important.
An O2-sensor-related code does not always mean the sensor itself was defective.
For example, a lean code could be caused by:
- Vacuum leak
- Intake gasket leak
- Weak fuel pump
- Restricted injector
- Exhaust leak
- MAF sensor problem
A downstream oxygen-sensor code may also be associated with a failing catalytic converter.
If the same code returns after replacement, diagnose the system rather than immediately assuming the new sensor is defective.
What If the Check Engine Light Comes Back?
If the light returns, scan the vehicle again.
Do not simply erase the code repeatedly.
Check whether the same code returned or a new code appeared.
A returning code may indicate:
- Incorrect sensor installed
- Wiring problem
- Heater-circuit fault
- Exhaust leak
- Vacuum leak
- Fuel-system problem
- Catalytic-converter issue
- Defective replacement sensor
The exact code and live data will help determine the next step.
What If the Engine Still Runs Rough?
If the engine still idles poorly or hesitates after sensor replacement, the O2 sensor may not have been the main cause.
Other common possibilities include:
- Vacuum leak
- Dirty throttle body
- Ignition coil problem
- Worn spark plugs
- Fuel injector issue
- PCV system fault
- Mass airflow sensor problem
- Low fuel pressure
If the replacement sensor is functioning normally, continue diagnosis rather than replacing more oxygen sensors.
What If Fuel Economy Does Not Improve Immediately?
Do not expect fuel economy to change after only a few miles.
Fuel mileage varies naturally with:
- Driving style
- Traffic
- Temperature
- Tire pressure
- Trip length
- Engine load
The ECM may also need some driving time to relearn fuel corrections.
Compare fuel economy over several normal tanks rather than judging the result from one short trip.
If fuel consumption remains unusually high, check fuel trims and other engine data.
Do You Need to Replace Both Oxygen Sensors?
No, not automatically.
If only one oxygen sensor was properly diagnosed as faulty, replacing every sensor is usually unnecessary.
Many vehicles have multiple oxygen sensors.
They may include:
- Bank 1 Sensor 1
- Bank 1 Sensor 2
- Bank 2 Sensor 1
- Bank 2 Sensor 2
Replace the sensor that has actually failed unless manufacturer guidance or diagnosis indicates otherwise.
Should You Replace the Sensor on the Other Bank Too?
Usually, no.
Two upstream sensors on opposite banks may be the same age, but that does not mean both are bad.
If one sensor is working correctly, there is generally no need to replace it simply because the opposite sensor failed.
That said, high-mileage sensors can age at similar rates, so another failure may eventually occur.
Diagnosis should still guide replacement.
Check the O2 Sensor Heater Circuit
If the original code involved the oxygen-sensor heater, replacing the sensor may solve the problem if the heater inside the sensor failed.
But the heater circuit also depends on:
- Power supply
- Fuse
- Ground
- Wiring
- Connector
- ECM control
If the same heater code returns, test the circuit instead of replacing the sensor again.
Do You Need Anti-Seize After Installation?
Most new oxygen sensors either come with an appropriate thread coating or include specific installation instructions.
Do not add excessive anti-seize compound.
If too much compound reaches the sensor tip or ventilation area, it can contaminate the sensor.
Follow the sensor manufacturer’s instructions.
If the sensor comes pre-coated, additional anti-seize may not be necessary.
Check for Cross-Threading or Improper Tightening
A new oxygen sensor should thread into the bung smoothly.
If it was forced into damaged or cross-threaded threads, it may not seat correctly.
That can cause:
- Exhaust leaks
- Sensor damage
- Difficult future removal
- Damaged exhaust threads
If the sensor does not tighten correctly, stop and inspect the threaded mounting area.
Does a New Oxygen Sensor Need Calibration?
Normally, no.
Most replacement oxygen sensors do not require manual calibration after installation.
The ECM interprets the sensor signal automatically.
However, certain advanced or manufacturer-specific systems may have special service procedures.
If the vehicle’s repair information specifies a calibration, reset, or adaptation process, follow it.
For typical replacement work, installation and normal driving are enough.
Can You Drive Immediately After Replacing an Oxygen Sensor?
Usually, yes, once the repair is complete and the vehicle has no leaks or other immediate problems.
You do not normally need to wait for the sensor to “break in.”
Start the engine, confirm normal operation, and drive normally.
If the vehicle has severe misfires, flashing warning lights, or strong exhaust leaks, do not continue driving until those issues are corrected.
What If the Vehicle Is Due for an Emissions Test?
After clearing trouble codes, the vehicle’s emissions readiness monitors may show not ready.
This can cause an emissions inspection problem even if the check engine light is off.
Drive the vehicle until the required monitors complete.
A scan tool can show which monitors are ready.
Avoid clearing codes again unless necessary because doing so may reset the monitors once more.
When Should You Recheck for Codes?
It is a good idea to scan the vehicle again after some normal driving, especially if the original fault caused a check engine light.
Check for:
- Stored codes
- Pending codes
- Permanent codes
- Readiness status
A pending code can indicate that the computer has detected the problem again but has not yet turned on the check engine light.
Permanent codes may remain stored until the vehicle’s computer confirms through successful monitoring that the fault has been corrected.
Can Permanent O2 Sensor Codes Be Cleared Manually?
On many OBD-II vehicles, certain permanent diagnostic trouble codes cannot be erased simply with a scan tool or battery disconnect.
The vehicle computer clears them only after it successfully reruns the relevant monitor and confirms the problem is gone.
This is normal.
If the repair is correct, continue driving until the monitor completes.
Common Mistakes After Replacing an Oxygen Sensor
One common mistake is clearing the code and assuming the job is finished without checking whether the engine actually operates normally.
Another is forgetting to secure the sensor wiring away from the exhaust.
Replacing a sensor without repairing an upstream exhaust leak is also common and can cause the same lean or sensor-performance code to return.
Finally, repeatedly disconnecting the battery or clearing codes can delay emissions readiness because each reset may restart the monitoring process.
FAQs About What to Do After Replacing Oxygen Sensor
Do I need to reset the computer after replacing an oxygen sensor?
Usually, no special reset is required.
You can clear the old trouble code with a scan tool, and the engine computer will relearn fuel corrections as you drive.
Should I clear the check engine light after replacing an O2 sensor?
Yes, once the repair is complete and you have verified the installation, clearing the old code is appropriate.
Remember that emissions readiness monitors may also reset.
How long does it take for a new oxygen sensor to work?
The sensor begins working once it reaches operating temperature.
Modern heated oxygen sensors warm up quickly, but fuel trims and emissions monitors may take additional driving time to fully update.
How many miles should I drive after replacing an oxygen sensor?
There is no universal mileage requirement.
Drive under normal mixed conditions until the vehicle completes its required self-tests and no codes return.
Will fuel economy improve immediately after replacing a bad O2 sensor?
Not necessarily.
The ECM may need time to relearn fuel corrections, and fuel economy should be evaluated over several normal trips or tanks.
Why is my check engine light still on after replacing the O2 sensor?
The code may not have been cleared, the computer may not yet have completed its self-tests, or the original fault may still exist.
Scan the vehicle again to determine which condition applies.
Do I need to replace the catalytic converter after replacing an O2 sensor?
No.
A bad oxygen sensor does not automatically mean the catalytic converter is bad.
Replace the converter only if testing confirms that it has failed.
What should I do if the same O2 sensor code comes back?
Recheck wiring, connectors, exhaust leaks, vacuum leaks, fuel trims, and related engine systems.
A returning code often means the underlying problem was not fully corrected.
Conclusion
The overall verdict on what to do after replacing oxygen sensor is simple: verify the installation, clear the old code if appropriate, let the engine reach operating temperature, drive the vehicle normally, and then confirm that the sensor is working correctly and no trouble codes return.
You usually do not need to disconnect the battery, perform a special break-in, or manually calibrate the new sensor. The engine computer will relearn fuel corrections and rerun emissions monitors during normal driving.
The most important step is verifying that the original problem is actually fixed. If the check engine light returns, fuel trims remain abnormal, or the engine still runs poorly, do not automatically blame the new oxygen sensor. Inspect the wiring, exhaust system, vacuum system, fuel delivery, and catalytic converter as appropriate. A successful repair is confirmed when the sensor data looks normal, the engine runs properly, and the fault does not return.