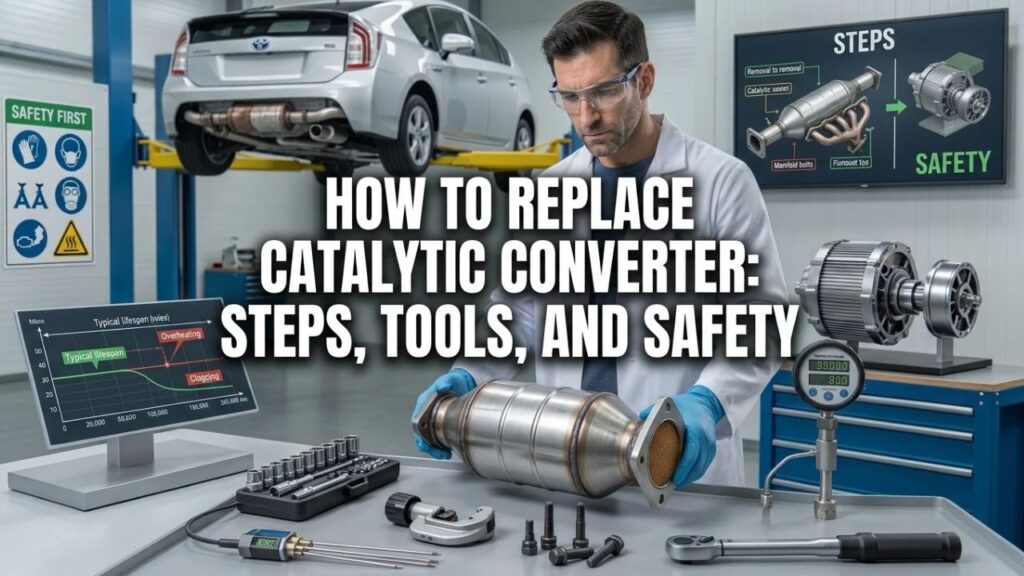
How to Replace Catalytic Converter: Steps, Tools, and Safety
Replacing a catalytic converter usually means confirming the old unit has failed, raising and supporting the vehicle safely, disconnecting oxygen sensors and exhaust joints, removing the old converter, fitting the correct emissions-approved replacement with new seals or hardware, and checking the system for leaks. Welded universal converters require cutting and welding rather than simple bolt-on work.
A converter replacement can go wrong long before the new part is installed. Rusted fasteners, damaged oxygen-sensor threads, poor exhaust alignment, and a converter that does not match the vehicle’s emissions certification can turn a straightforward repair into a larger exhaust job.
The bigger risk is replacing the converter without fixing what damaged it. Misfires, an overly rich mixture, oil burning, coolant contamination, and exhaust leaks can shorten the life of a replacement catalyst. A diagnosis should come before parts removal.
For U.S. light-duty vehicles, the EPA lists the catalytic converter as a specified major emissions-control component covered by the federal emissions defect warranty for 8 years or 80,000 miles, subject to the warranty terms. Check the vehicle’s warranty booklet before buying a replacement, especially if the original converter is still within that period.
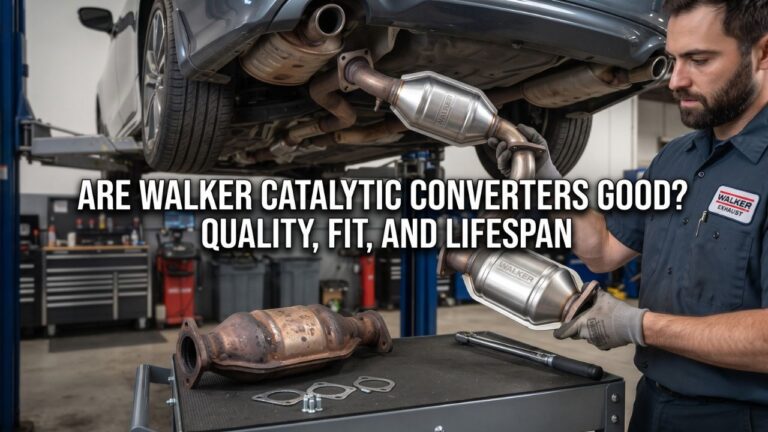
For how to replace catalytic converter parts correctly, the first decision is direct-fit versus universal. A direct-fit unit normally uses vehicle-specific flanges, hangers, brackets, and sensor locations. A universal unit may need cutting, measuring, fabrication, and welding, which raises the skill level of the job.
I would also treat emissions compatibility as part of the repair rather than an afterthought. Federal anti-tampering rules do not treat a catalytic converter as an optional exhaust part, and some states impose stricter replacement requirements. The new converter must match the vehicle application and emissions certification rather than simply fitting the pipe diameter.
The process below covers pre-repair checks, tools, direct-fit removal and installation, universal converters, oxygen sensors, seized hardware, leak checks, and situations where an exhaust shop is the safer choice.
Before You Replace the Catalytic Converter
Do not start by unbolting the converter. First confirm that replacement is justified and that the engine is not carrying a fault that could damage the new part.
Confirm the Converter Is Actually Bad
A P0420 or P0430 code alone does not prove that the converter is physically clogged or that it must be replaced.
Check for misfire codes, fuel-trim faults, oxygen-sensor faults, exhaust leaks, oil consumption, coolant loss, and other engine problems. If the suspected issue is blockage, an exhaust backpressure test gives stronger evidence than a catalyst-efficiency code alone.
Walker recommends correcting stored diagnostic trouble codes, exhaust leaks, fuel-control faults, and contamination problems before converter replacement.
If the converter rattles internally, is physically damaged, has a melted substrate, is badly restricted, or has failed emissions diagnosis after other causes have been ruled out, replacement becomes easier to justify.
Check Warranty Coverage
Before paying for a converter, check the vehicle’s in-service date and mileage.
EPA federal emissions warranty rules cover specified major emissions components, including catalytic converters, for 8 years or 80,000 miles on covered light-duty vehicles. A manufacturer can deny coverage when failure resulted from improper use or maintenance rather than a defect.
If the vehicle may qualify, contact an authorized facility for the vehicle brand before paying for an outside repair.
Match the Converter to the Emissions Label
Locate the Vehicle Emissions Control Information (VECI) label under the hood. It commonly appears on the hood underside, radiator support, strut tower, fan shroud, or firewall.
Use that label to identify the emissions certification and engine-family information needed to select the correct converter. Some vehicles operating in states with California-type aftermarket converter rules require a CARB-compliant replacement.
Do not order a converter solely from pipe diameter, engine displacement, or a photo of the old part.
Key Takeaway: Confirm the failure, repair the cause, check warranty coverage, and match the replacement to the vehicle’s emissions certification before removing the old converter.
Direct-Fit vs Universal Catalytic Converter
A direct-fit converter and a universal converter perform the same basic emissions task, but installation work can differ substantially.
Direct-Fit Converter
A direct-fit converter is built around a specific vehicle application.
It may include:
- Correct inlet and outlet flanges
- Vehicle-specific bends
- Hangers and brackets
- Heat shields
- Oxygen-sensor bungs
- Correct overall length
Many direct-fit units can be installed without welding when the original joints and fasteners come apart cleanly. Walker describes its direct-fit design as a bolt-on replacement using OE-style hangers, brackets, routing, and heat shields.
For home repair, this is generally the simpler option.
Universal Converter
A universal converter is not shaped as a complete vehicle-specific exhaust section.
Installation may require cutting the old converter from the pipes, positioning the replacement correctly, fabricating filler pipe, retaining oxygen-sensor locations, and welding leak-free joints.
Walker’s universal installation procedure calls for measuring the original relationship between the upstream oxygen sensor and converter, keeping hangers in their original locations, following converter flow direction, and fully sealing the welds.
A universal converter may cost less as a part, but fabrication labor can change the total repair cost.
Key Takeaway: Direct-fit units are usually the better DIY option; universal converters often require measuring, cutting, fabrication, and welding.
Tools and Parts Needed
A bolt-on converter replacement commonly requires:
- Floor jack or vehicle lift
- Rated jack stands
- Wheel chocks
- Safety glasses
- Work gloves
- Socket and wrench set
- Ratchet and extensions
- Breaker bar
- Penetrating oil
- Oxygen-sensor socket
- Torque wrench
- Replacement converter
- New exhaust gaskets
- New nuts, bolts, or spring hardware when specified
- Replacement clamps if required
- OBD-II scan tool
Some vehicles require specialty sockets, removal of heat shields from above, or access around engine support brackets.
Inspect the replacement before lifting the vehicle. Compare flange shape, bolt pattern, pipe routing, O2 sensor bungs, hanger locations, and flow direction.
Old compressed gaskets and heavily corroded hardware are poor candidates for reuse unless the service procedure specifically says otherwise.
How to Replace Catalytic Converter Step by Step
These steps describe a common direct-fit, bolt-on replacement. Vehicle-specific service information controls the exact removal order, support points, torque figures, and sensor procedure.
1. Let the Exhaust Cool Completely
Park on a solid, level surface and allow the exhaust system to cool.
Catalytic converters can remain hot well after the engine is shut down. Contact with a hot shell, flange, or pipe can cause serious burns.
Apply the parking brake and chock the wheels that will stay on the ground.
2. Raise and Support the Vehicle
Lift only at approved jacking points.
Place rated jack stands at the vehicle manufacturer’s support locations and verify that the vehicle is stable before going underneath.
Never work beneath a car supported only by a hydraulic jack.
3. Find the Converter and Oxygen Sensors
Follow the exhaust system away from the engine.
Some vehicles have one converter, while others use multiple converters, including close-coupled units near or within the exhaust manifold.
Identify every oxygen or air-fuel sensor connected to the section being removed. Mark similar connectors if needed so upstream and downstream wiring does not get mixed up.
4. Disconnect the O2 Sensor Wiring
Unplug the electrical connectors before moving the exhaust section.
Release the connector locks rather than pulling on the wires. Free the harness from brackets and clips attached to the exhaust.
If a sensor must come out, use an oxygen-sensor socket. Penetrating oil may assist with corroded threads after the exhaust has cooled.
Some replacement sensors already have approved anti-seize on their threads. Apply thread compound only when the sensor or vehicle instructions call for it, and never contaminate the sensor tip.
5. Treat Rusted Exhaust Fasteners
Apply penetrating oil to converter flange nuts, clamps, and support bolts.
A six-point socket grips rusty nuts better than a loose-fitting open-end wrench. Use controlled force and watch the studs for twisting.
A broken manifold stud can turn a converter job into a much larger repair.
6. Support the Exhaust
Support the pipe or converter assembly before releasing its fasteners.
Do not let the weight of the exhaust hang from a flex joint, O2 sensor wire, manifold flange, or rubber mount.
Long converter-and-pipe assemblies can be awkward enough that a second person is useful during removal.
7. Remove Shields, Hangers, and Brackets
Remove the heat shields and supports needed to free the converter.
Note the orientation of brackets and save reusable hardware.
A support bracket can carry part of the converter’s weight and reduce stress at flanges or welds. Walker’s direct-fit procedure for one application specifically calls for reconnecting the converter support bracket and hanger.
8. Disconnect the Converter From the Exhaust
Remove the inlet and outlet fasteners.
Exhaust systems may use:
- Flat flanges
- Ball-and-socket joints
- Spring bolts
- Slip joints
- Clamps
- Welded connections
Do not pry against an O2 sensor bung or thin converter shell.
If the mating flange has rusted too badly to create a good seal, repair or replace that adjoining section before fitting the new converter.
9. Remove and Compare the Old Converter
Lower the old assembly carefully.
Place it beside the replacement and compare:
- Pipe routing
- Flow direction
- Flange angles
- Bolt pattern
- Hanger positions
- O2 sensor locations
- Heat shields
- Overall length
Stop if the new unit is clearly different. Do not pull the exhaust into alignment with excessive force to compensate for the wrong part.
10. Inspect the Remaining Exhaust
Check the exhaust manifold, flex pipe, adjoining pipes, and flange surfaces.
Cracks or leaks upstream of the converter can affect oxygen-sensor readings and catalyst-monitor results. Walker includes manifold inspection as part of its converter installation procedure.
Clean sealing surfaces without damaging them and install the new gaskets or sealing rings specified for the vehicle.
11. Position the New Converter Loosely
Place the converter in position and start the fasteners without fully tightening one connection first.
Attach hangers and support brackets loosely enough for the complete system to settle into its natural position.
Check clearance around the floor, driveshaft, wiring, heat shields, suspension, and body.
The converter should not be held under twist or side load.
12. Tighten the Exhaust to Specification
Align the exhaust and tighten the hardware in the proper sequence.
Use the vehicle manufacturer’s torque figures rather than estimating tightness. Walker likewise instructs installers to torque direct-fit converter flange hardware to manufacturer specifications.
Spring-loaded exhaust joints may have a different tightening method from rigid flanges.
13. Reinstall the Oxygen Sensors
Install each sensor in its correct position and reconnect the wiring.
Route the harness through the original clips and keep it away from hot exhaust surfaces, rotating components, steering parts, and sharp edges.
Reconnect every plug until its locking feature engages.
14. Refit Heat Shields and Supports
Reinstall all shields, hangers, braces, and brackets removed for access.
Do not discard heat shields simply because one had been rattling. Repair or replace damaged shield hardware.
These shields limit heat transfer to the floor and nearby vehicle components.
15. Start the Engine and Check for Leaks
Lower the vehicle after verifying that tools and supports are clear.
Start the engine and listen around the repaired joints.
A ticking, puffing, or hissing noise can indicate a flange, clamp, sensor bung, or weld leak.
Do not touch the exhaust during this inspection. It can heat rapidly after startup.
Key Takeaway: Support the car and exhaust safely, protect the O2 sensors, replace sealing parts, align the converter before final tightening, and inspect the finished repair for leaks.
How to Replace a Welded Universal Converter
Universal units demand more fabrication skill than direct-fit parts.
Measure the Original Position
Record the converter and oxygen-sensor locations before cutting.
Converter position influences catalyst warm-up and monitoring behavior. Walker instructs installers to retain sensor and hanger locations close to their original positions.
Mark your cut points only after comparing the replacement length and pipe overlap.
Check Converter Direction
Many universal converters have a specified flow direction.
Look for the arrow or body markings and position the unit according to the manufacturer’s instructions, normally with the flow arrow pointing toward the tailpipe.
Cut the Old Converter Out Safely
Protect fuel lines, brake lines, wiring, underbody coatings, the fuel tank, and other nearby components from sparks and hot metal.
The cutting tool needs enough clearance to work without striking the body or another exhaust section.
Cutting and welding under a vehicle add fire and eye hazards that do not exist during a simple bolt-on replacement.
Fit the New Converter
Test-fit before welding.
Avoid inserting exhaust pipe so deeply that it can contact the converter substrate. Walker’s cited universal procedure specifies no more than 2 inches of pipe insertion for that installation method.
Retain the original hangers and provide enough body clearance for heat and movement.
Seal the Welds Completely
Weld around the full circumference of each joint.
Even a small leak can draw extra oxygen into the exhaust and disturb downstream sensor readings. A pinhole leak near the converter may contribute to another catalyst-efficiency code.
If you do not already have exhaust-welding experience and a safe work area, an exhaust shop is the better place for a universal converter installation.
Key Takeaway: Universal installation requires accurate positioning, correct flow direction, safe cutting, proper pipe overlap, original sensor placement, and fully sealed welds.
Common Catalytic Converter Replacement Problems
Most installation trouble comes from age and corrosion rather than the replacement converter itself.
Seized Bolts
Repeated heat cycles and road exposure can lock nuts and studs together.
Penetrating oil, six-point sockets, and steady force are useful first steps. Stop if the stud begins twisting badly or the nut rounds off.
Stuck Oxygen Sensors
O2 sensors can seize into their threaded bungs.
Use the correct socket and avoid twisting the harness. If the sensor hex or bung begins deforming, forcing it can damage an expensive new exhaust part.
Rusted Mating Pipes
A converter flange may come apart only to reveal that the adjoining pipe is too thin to seal.
Inspect the rest of the exhaust before ordering parts so the repair does not stop halfway because another section needs replacement.
Wrong Emissions Converter
A converter can physically bolt onto a vehicle and still be wrong for its emissions application.
Check the VECI label, engine family, vehicle listing, sensor layout, and state requirements before installation.
Key Takeaway: Seized hardware, stuck O2 sensors, rusted adjoining pipes, and incorrect emissions fitment cause many converter replacement problems.
What to Check After Replacement
A converter replacement is not finished until the complete exhaust system and original fault are checked.
Inspect for Exhaust Leaks
Listen around every flange, clamp, weld, and sensor connection.
Leaks near the converter can affect catalyst monitoring and may send exhaust gases where they should not go.
Repair any leak before judging the new converter from scan data.
Check Diagnostic Codes
Once the engine and exhaust faults have been repaired, clear codes with an appropriate scan tool if the service procedure calls for it.
The catalyst monitor may need normal driving before it runs again and reports a completed test.
Repeatedly clearing a returning code does not repair its cause.
Watch for Repeat Symptoms
Pay attention to:
- Returning P0420 or P0430
- Misfire codes
- Weak acceleration
- Sulfur smell
- Excess converter heat
- Rattling
- Exhaust leaks
- New fuel-economy problems
A replacement that quickly overheats or produces the same code suggests that another fault remains active.
Verify the Original Cause Is Fixed
A converter damaged by misfire, excess fuel, engine oil, or coolant can fail again if the source remains.
The replacement converter should be the final part of a confirmed repair rather than the first part installed after a warning light appears.
Key Takeaway: Check leaks, codes, sensor wiring, and the original engine fault after installation so the new converter is not exposed to the same damage.
When Professional Replacement Makes More Sense
Professional service is a better choice when the converter is welded in place, integrated into the exhaust manifold, buried behind major components, or surrounded by badly corroded hardware.
It also makes sense when exhaust studs have broken, oxygen sensors are seized, several converters need diagnosis, or welding would take place near fuel and brake components.
A shop can test exhaust backpressure, engine fuel control, and sensor operation before installing an expensive part.
That diagnostic work may cost less than replacing a converter that was never the actual cause of the problem.
Conclusion
For how to replace catalytic converter parts, the simplest DIY situation is an accessible direct-fit converter with serviceable bolt-on joints. Confirm the diagnosis, cool and support the vehicle, disconnect the sensors, remove the old converter, fit new seals, align the exhaust, and tighten the system to vehicle specifications.
The job also needs an emissions and root-cause check. Use a converter approved for the vehicle, check warranty eligibility, and repair misfires, fuel-control faults, oil burning, coolant contamination, and exhaust leaks before expecting the new catalyst to last.
Universal converters add measuring, cutting, welding, and fire hazards. I would leave that version to an exhaust shop unless you already have suitable equipment, safe under-car access, and exhaust fabrication experience.
After replacement, inspect every disturbed joint for leakage and watch for returning fault codes. A new catalytic converter should complete a correctly diagnosed repair rather than hide an engine problem that is still present.
FAQs About Replacing a Catalytic Converter
Can I replace a catalytic converter myself?
Yes, if the vehicle has an accessible direct-fit converter, the fasteners are serviceable, and you have safe lifting equipment plus the correct tools. Rusted hardware, manifold-mounted converters, and welded systems can raise the job difficulty quickly.
Do I need to weld a replacement catalytic converter?
Not always. Direct-fit converters often use factory-style flanges, hangers, and sensor locations and may bolt directly into place. Universal converters commonly require cutting and welding.
Should I replace the oxygen sensors at the same time?
Not automatically. Reuse sensors that test correctly and meet the vehicle maker’s service requirements. Replace a sensor if diagnosis shows a fault, its wiring or threads are damaged, or service information calls for a new one.
Can I reuse the old catalytic converter gaskets?
New gaskets or sealing rings are usually the safer option when the joint uses replaceable seals. Old gaskets may be compressed, burned, rusted, or damaged and can leak after reassembly.
How long does catalytic converter replacement take?
Repair time varies greatly by vehicle. Accessible bolt-on converters with clean hardware can be relatively straightforward. Rusted studs, seized sensors, tight engine-bay access, fabrication, welding, or other engine repairs can add substantial labor.
Is it legal to install any aftermarket catalytic converter?
No. The replacement must comply with the emissions rules that apply to the vehicle and location. Federal requirements apply nationwide, and some states use stricter CARB-type rules. Match the converter to the vehicle’s emissions certification and approved application.
Why did my replacement catalytic converter fail again?
Repeat failure often points to an unresolved misfire, rich fuel mixture, oil consumption, coolant contamination, exhaust leak, or incorrect converter application. Diagnose the engine and exhaust system before installing another converter.
Should I replace a catalytic converter just because of P0420?
No. P0420 indicates catalyst performance below the programmed threshold, but exhaust leaks, mixture problems, misfires, sensor faults, and contamination can contribute. Confirm the converter condition and repair related faults before replacing it.